Introduction
Welcome to our API! Notify provides one single API to connect your application to many different types of channels for communication, including multiple mail and sms channels, mobile push, web push, Slack and more. This documentation provides three main sections to get you started :
Our quickstart guide will get you up and running in just a few minutes.
Our guides explain the user interface of our Notify tool. Here you will learn how to set up channels and templates, search the logs, receive replies, and more
Our API section contains a detailed overview of our API, including examples
In case of questions, you can reach us at info@notify.eu.
Quickstart
After registering and activating your account in Notify, most of the basic setup work has already been done for you. We currently provide two prepaid channels (sms and email) and you receive some free credits to get started as easily as possible. For each channel, we have created a basic template for testing purposes.
Your Credentials
After your first signin, you will receive a client id and secret key. Please keep them somewhere safe, as you cannot view the secret key again (don't worry, you can generate new keys later). You need these for authenticating your API call.

To use the Notify API, your clientId and secret key must be included as http headers :
| Header key | Type | Required | Notes |
|---|---|---|---|
| X-ClientId | String | Yes | Your credential client id |
| X-SecretKey | String | Yes | Your credential secret key |
If your credentials are invalid you will receive the following (or similar) error message:
{ "success": false, "message": "customer not found" }
API call
Call endpoint
https://api.notify.eu/notification/send
Example Notify call
const request = require('request');

request({
    url: "https://api.notify.eu/notification/send",
    method: "POST",
    json: true,
    body: {
      "message": {
        "notificationType": "test_email",
        "language": "en",
        "params": {
          "firstName" => "Max"
        },
        "transport": [
          {
            "type": "email",
            "recipients": {
              "to": [
                {
                  "name": "John Doe",
                  "recipient": "john@example.com"
                }
              ]
            }
          }
        ]
      }
    }
}, function (error, response, body){
    console.log(response);
});
<?php

$postBody = [
  "message" => [
    "notificationType" => "test_email",
    "language" => "en",
    "params" => ["firstName" => "Max"],
    "transport" => [
      [
        "type" => "email",
        "recipients" => [
          "to" => [
            ["name" => "John Doe", "recipient" => "john@example.com"]
          ]
        ]
      ]
    ]
  ]
];

$ch = curl_init("https://api.notify.eu/notification/send");
curl_setopt_array($ch, array(
    CURLOPT_POST => TRUE,
    CURLOPT_RETURNTRANSFER => TRUE,
    CURLOPT_HTTPHEADER => array('Content-Type: application/json', 'X-ClientId: <your_client_id>', 'X-SecretKey: <your_secret_key>'),
    CURLOPT_POSTFIELDS => json_encode($postBody)
));

$response = curl_exec($ch);

if ($response === FALSE){
    die(curl_error($ch));
}

$responseData = json_decode($response, TRUE);
curl -i -H "Content-type: application/json" -H "X-ClientId: <your_client_id>" -H "X-SecretKey: <your_secret_key>" -X POST https://api.notify.eu/notification/send -d '
  {
    "message": {
      "notificationType": "test_email",
      "language": "en",
      "params": {
        "firstName" => "Max"
      },
      "transport": [
        {
          "type": "email",
          "recipients": {
            "to": [
              {
                "name": "John Doe",
                "recipient": "john@example.com"
              }
            ]
          }
        }
      ]
    }
  }
  '
All that's left to do now, is to make an API call. Our API uses the JSON format, you can view all the options in the API section. At the right of your screen, there's a short example for you to copy and run in your terminal (don't forget to change the headers and the recipient email)
After the API call, you should receive a message in your inbox. You can check the logs in the Notify application to see what has been sent.

Guides
Manage your channels
By default, you have two prepaid channels available to use in Notify. You can add as many custom channels as you want and configure them to use your own backend providers, such as mandrill, twilio, slack and more.
To manage your channels, select the settings menu :

The default settings tab is your channels page :

Here you will see your prepaid channels. These are readonly, except for the channel key.

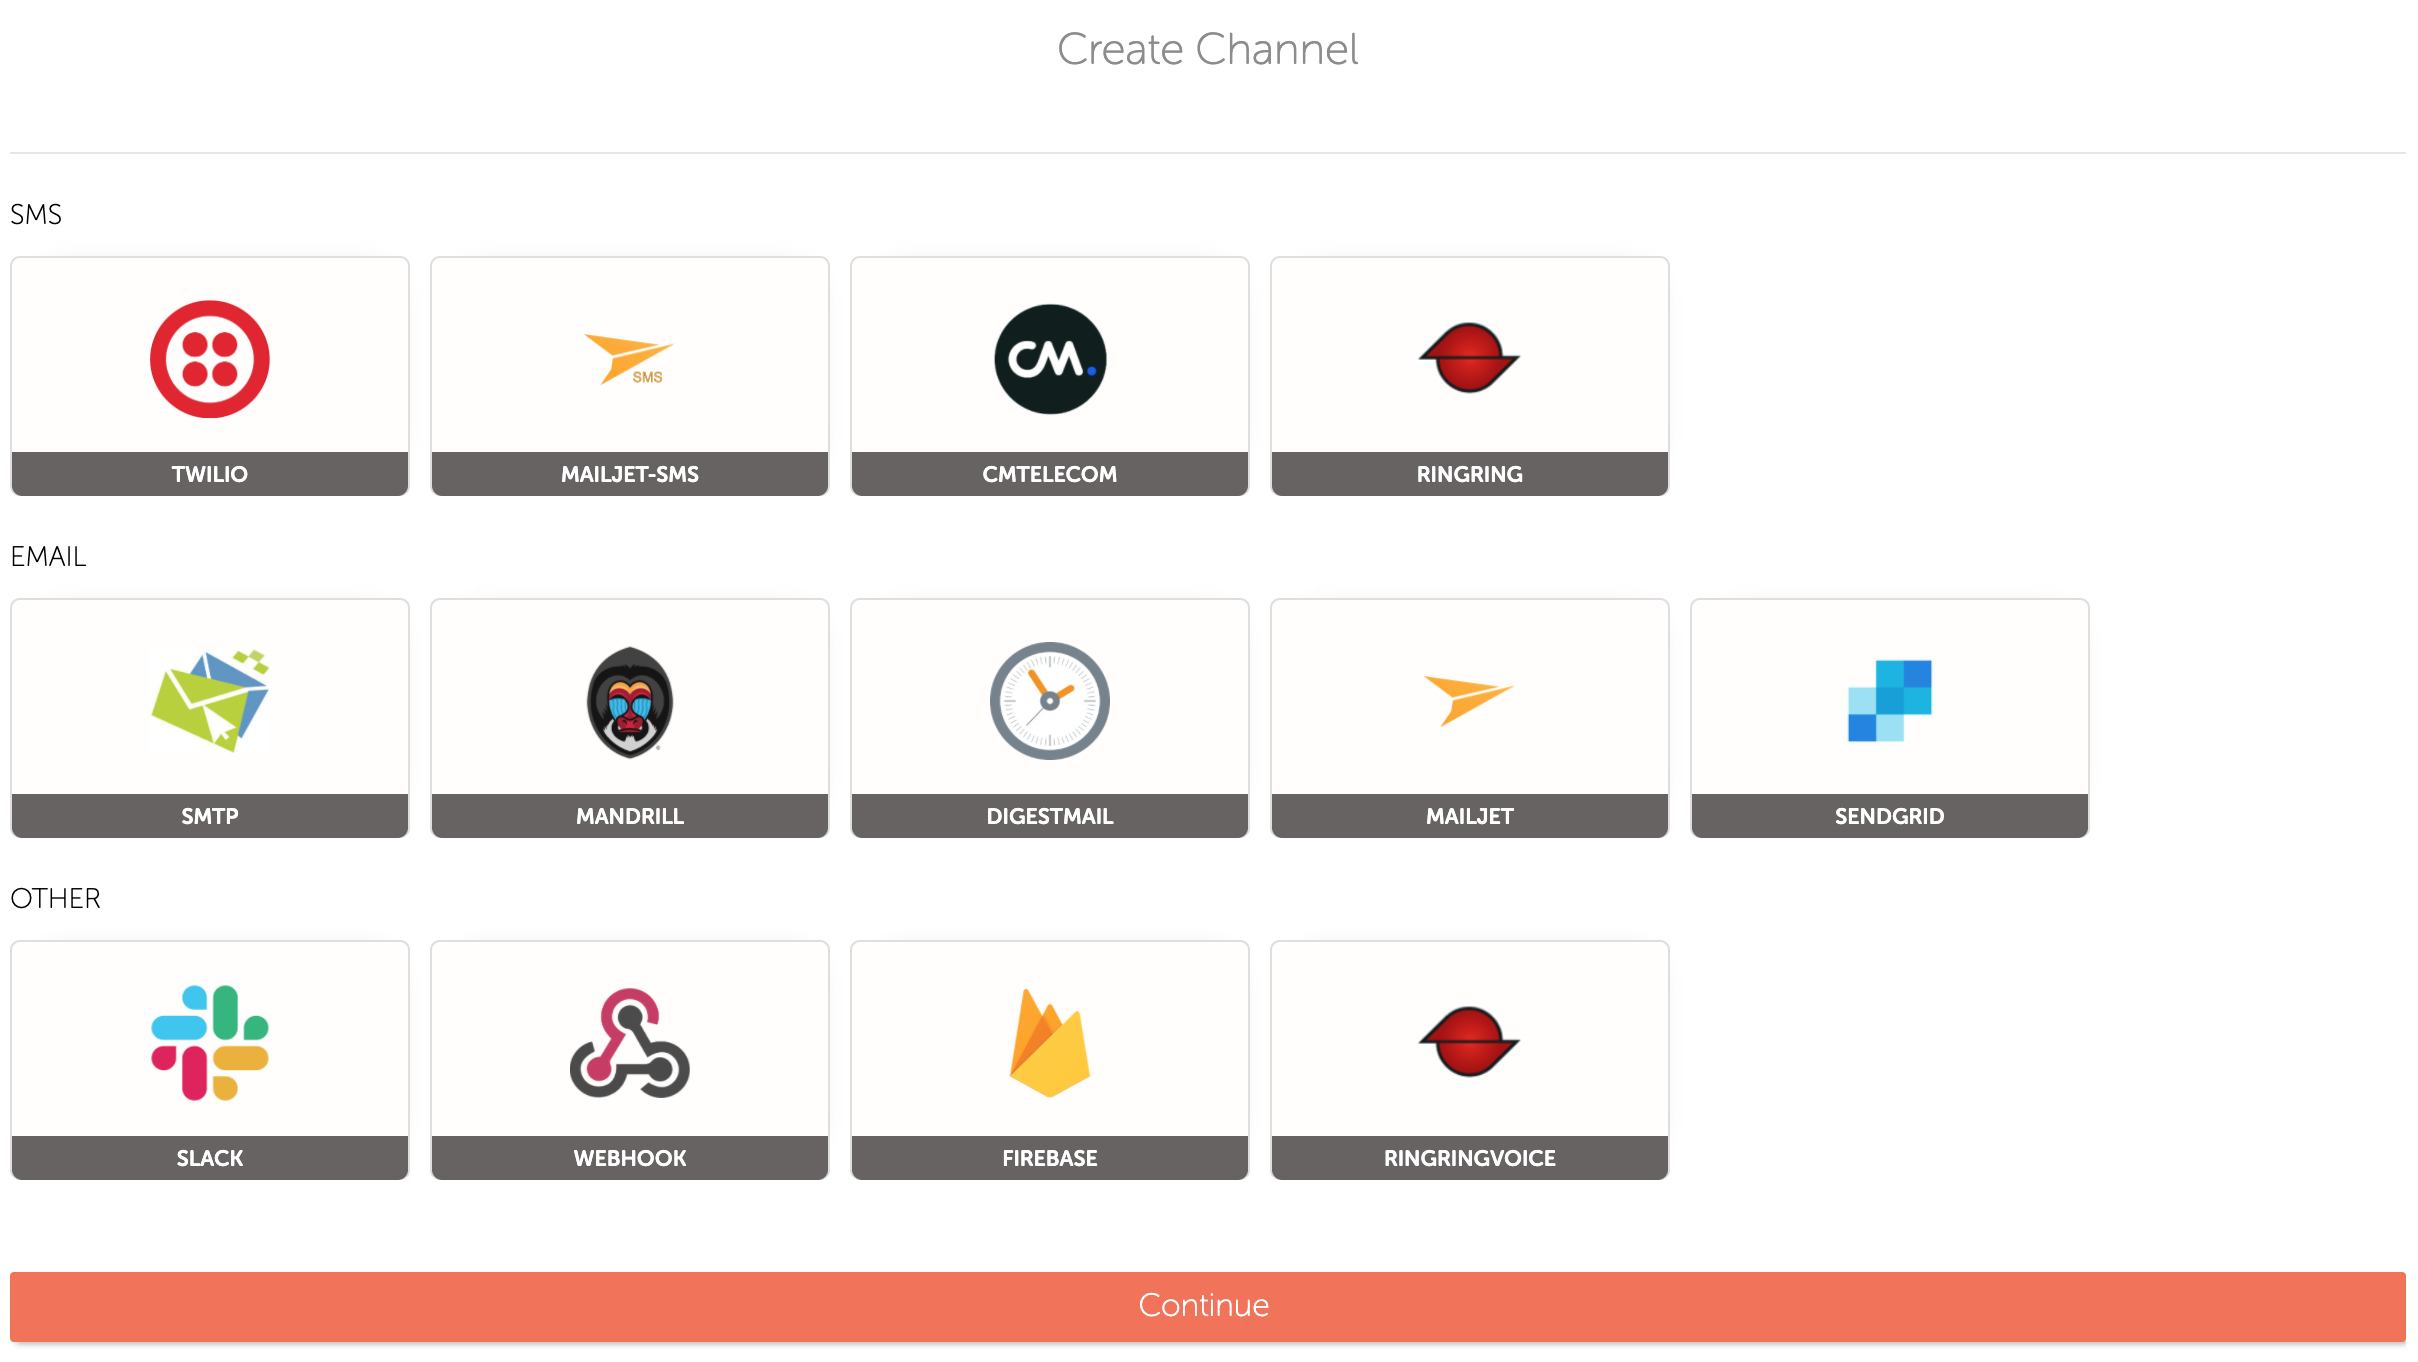
To add a new channel, select 'Create channel'. A popup will appear, guiding you through the process.
First, you need to select a channel type. You have a choice of multiple email and SMS providers, Slack, mobile push, webhooks and more :
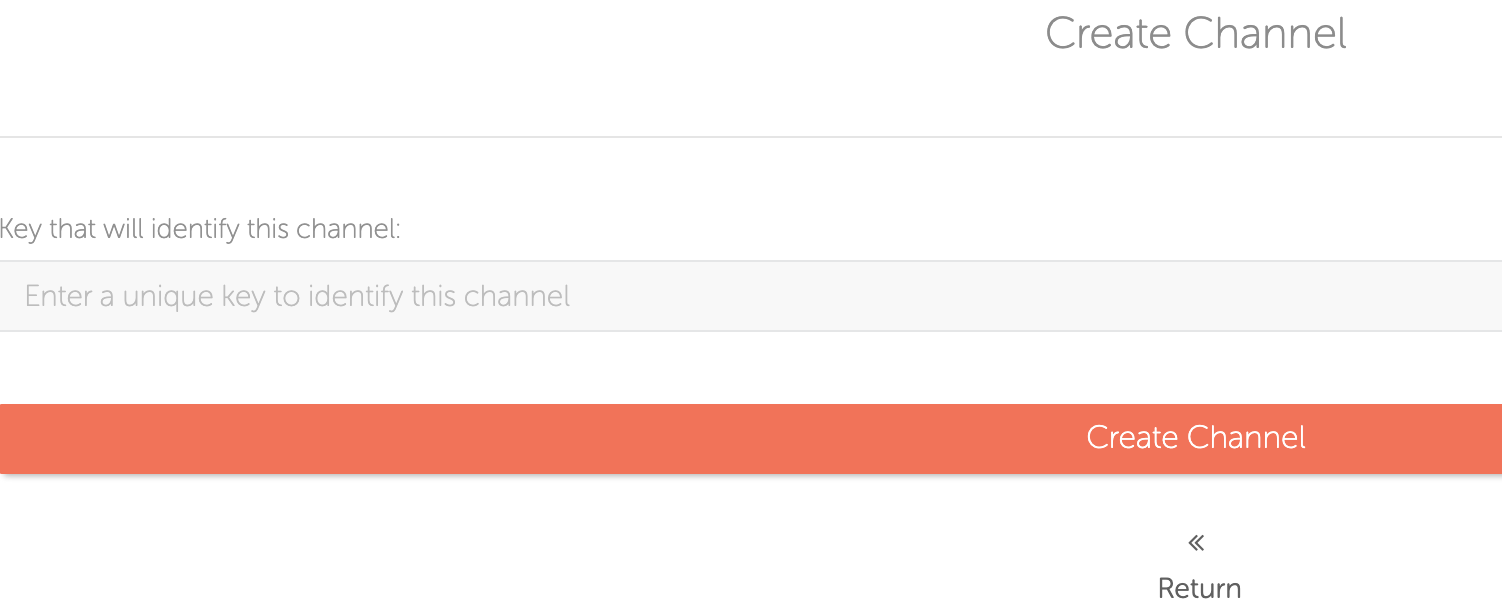
Each channel has a unique key that will be used when sending notifications through our API. You can use generic keys (email, sms) or very specific keys (email_mandrill, sms_twilio) :
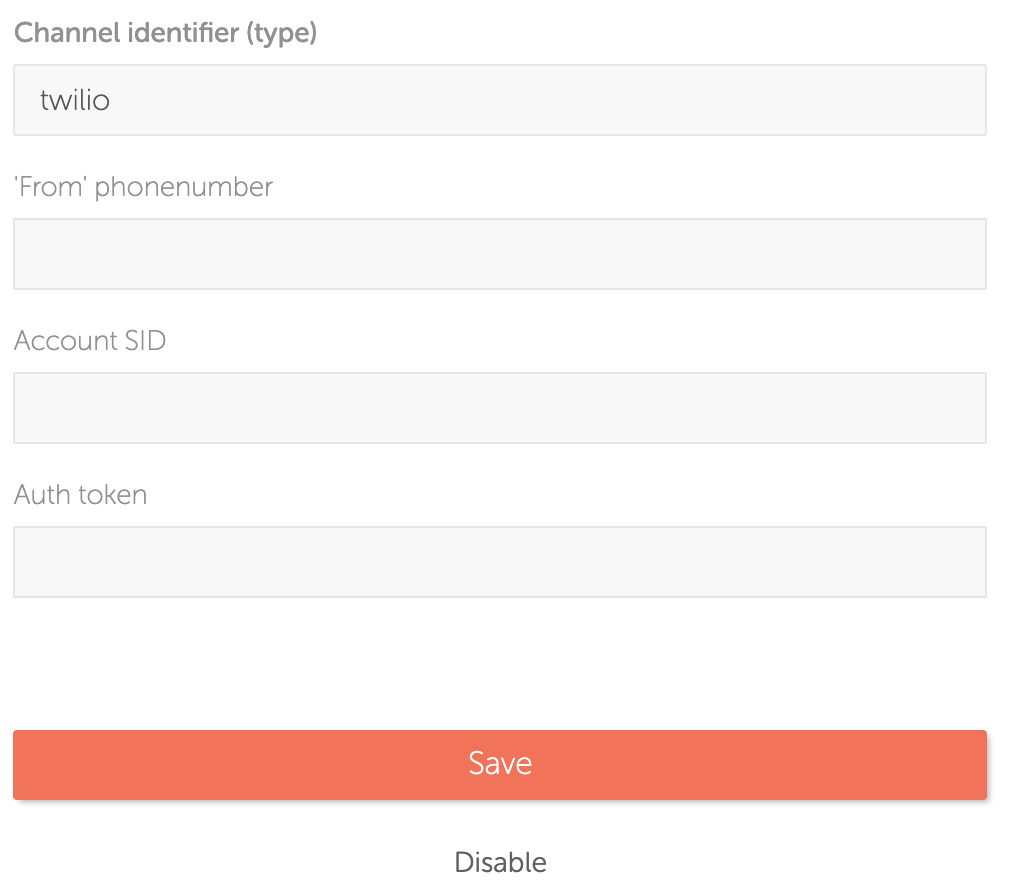
Finally, you will need to configure your channel. This configuration depends on the type of the channel. Follow the documentation provided on-screen in your channel configuration screen :
Save your channel, and you are almost ready to start sending notifications ! (Almost... first you need at least one template assigned to this new channel !)
Create content
The content of your notifications is managed in Notify. This way, there's no need for code changes and releases whenever a notification needs to be modified. Notify is built in a flexible way, allowing you to build templates for specific channels, or re-use templates for multiple channels.
Templates
You templates are managed from the 'Templates' tab :

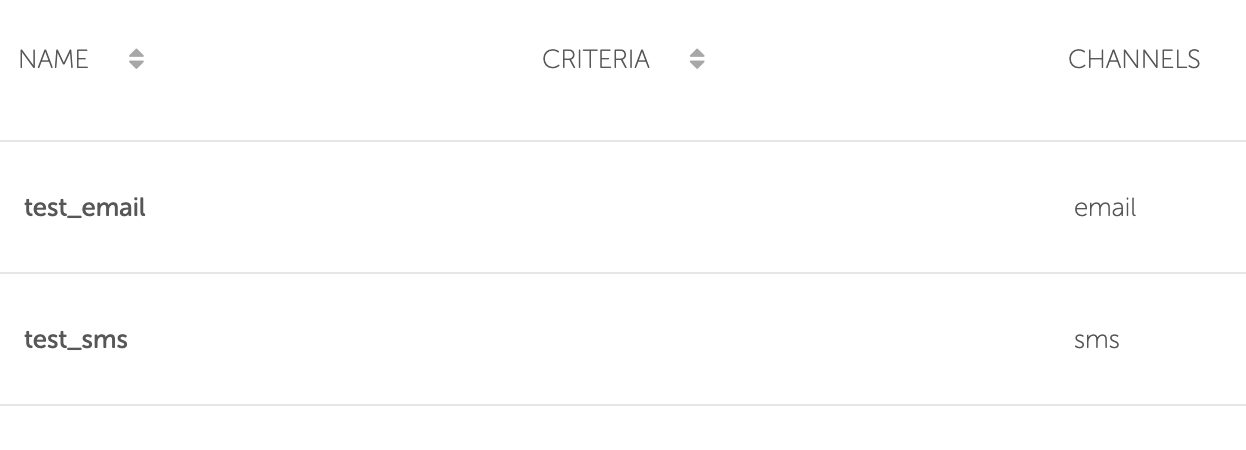
There, you will find an overview of your available templates, including the channels for which each template is available. By default, Notify has created a template for the prepaid channels (email and sms). You can modify these templates, and of course create new ones.
Create template
Create a new template by pressing the 'Create template' button in the overview page. You can follow the on-screen documentation for configuring your template and assigning channels. The multilingual content of your template will be created afterwards.
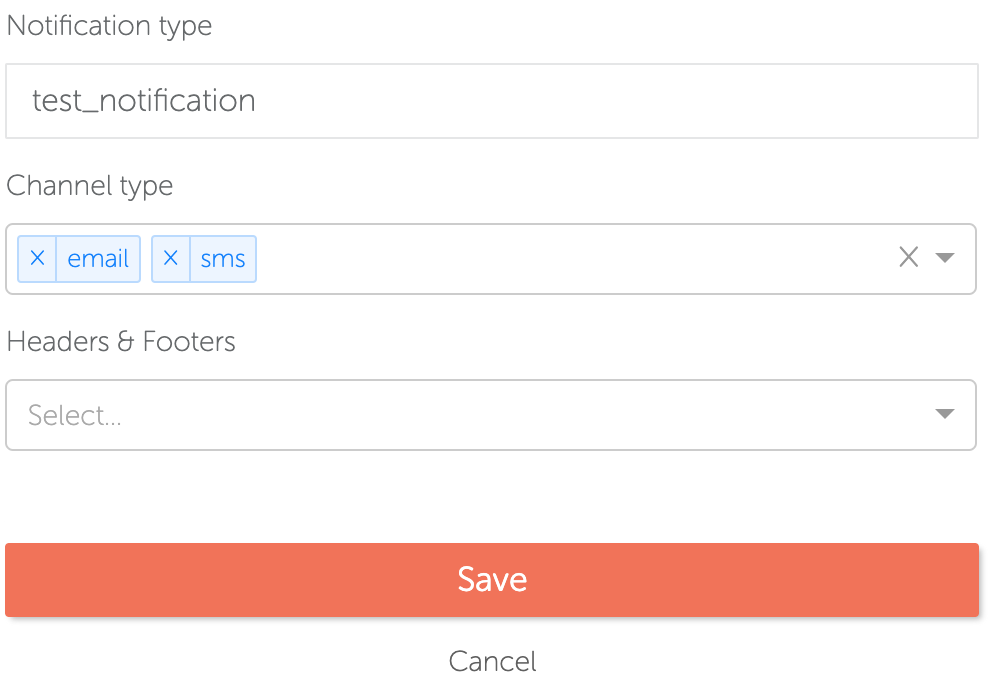
When your template has been created, you will have the option to add content in multiple languages.
Add content
For a new template, there is no content created yet. Add content in your chosen language by pressing the 'Add content' block in your notification detail screen :
Example input params (API)
params : {
    "name" : "Some name",
    "user": {
      "email": "test@notify.eu"
    },
    "notifications" : [
        {
            "text" : "Some info"
        },
        {
            "text" : "Some more info"
        }
    ]
}
In the notification detail screen, you can manage the content of your notification. Follow the on-screen instructions for filling in the fields.
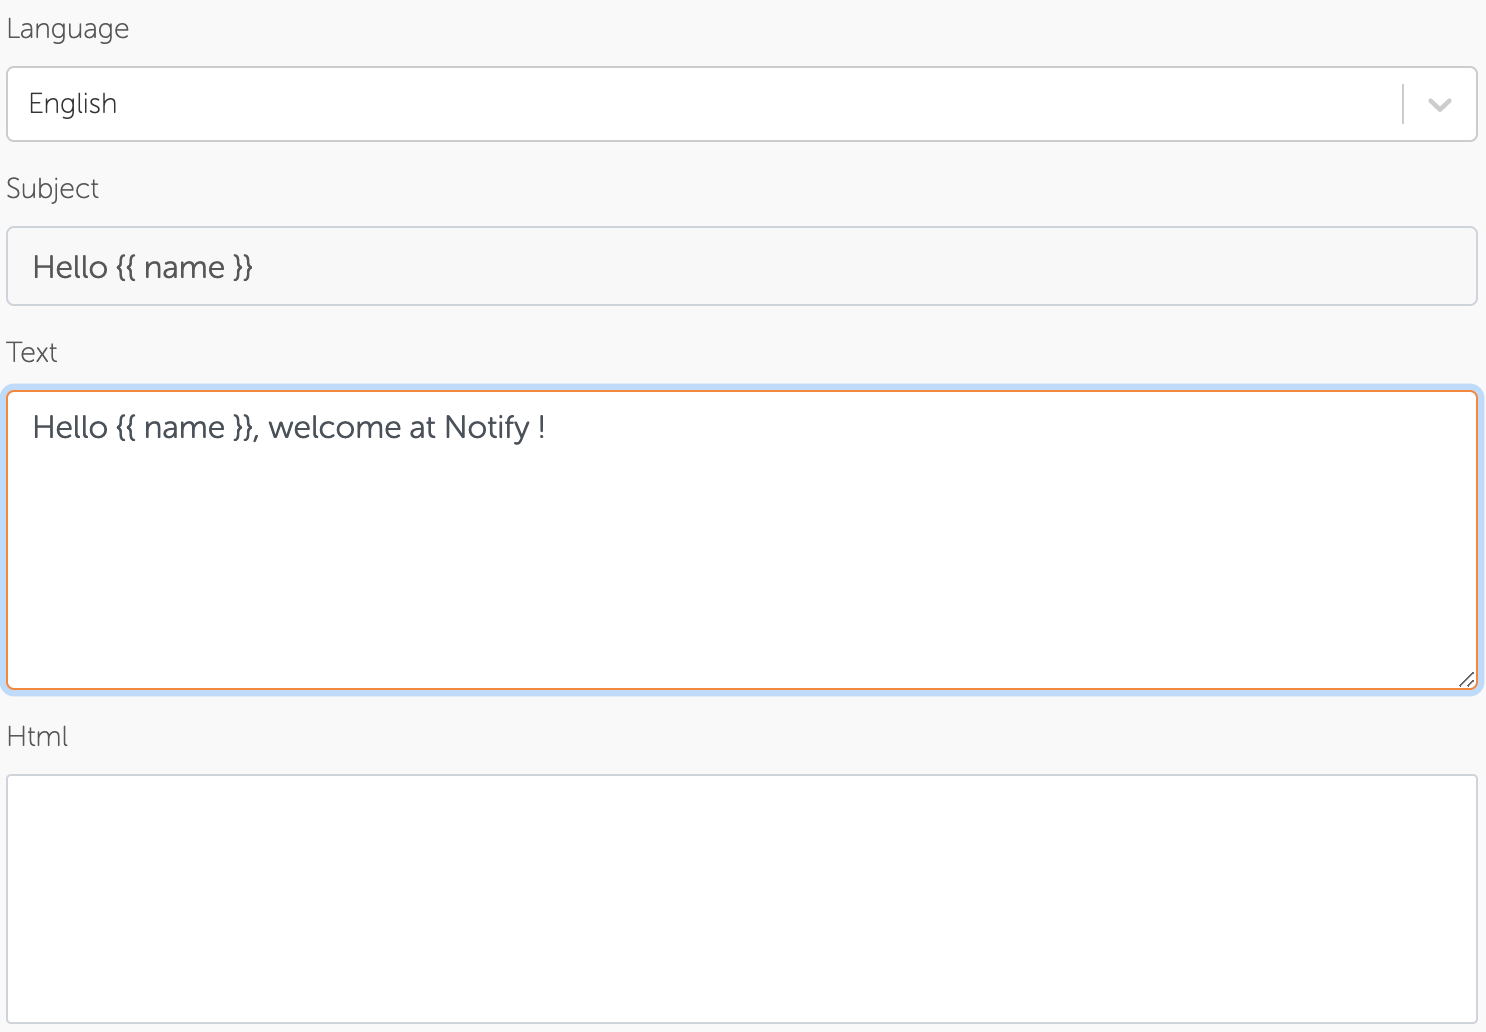
When you click the html field, our powerful wysiwyg editor will open, allowing you to design your template from scratch or by modifying a predefined template.
Template editor
Our template editor supports both drag'n drop editing and html code editing. Switching between the two modes can be done using the toggle on the top left of the screen.

WYSIWYG mode
The default mode in our editor allows you to design your template by dragging components on your canvas and modifying its parameters (color, size, ...). You can start from an empty canvas, or use our pre-made template to get started quickly. Select your choice in the bottom right of the screen.
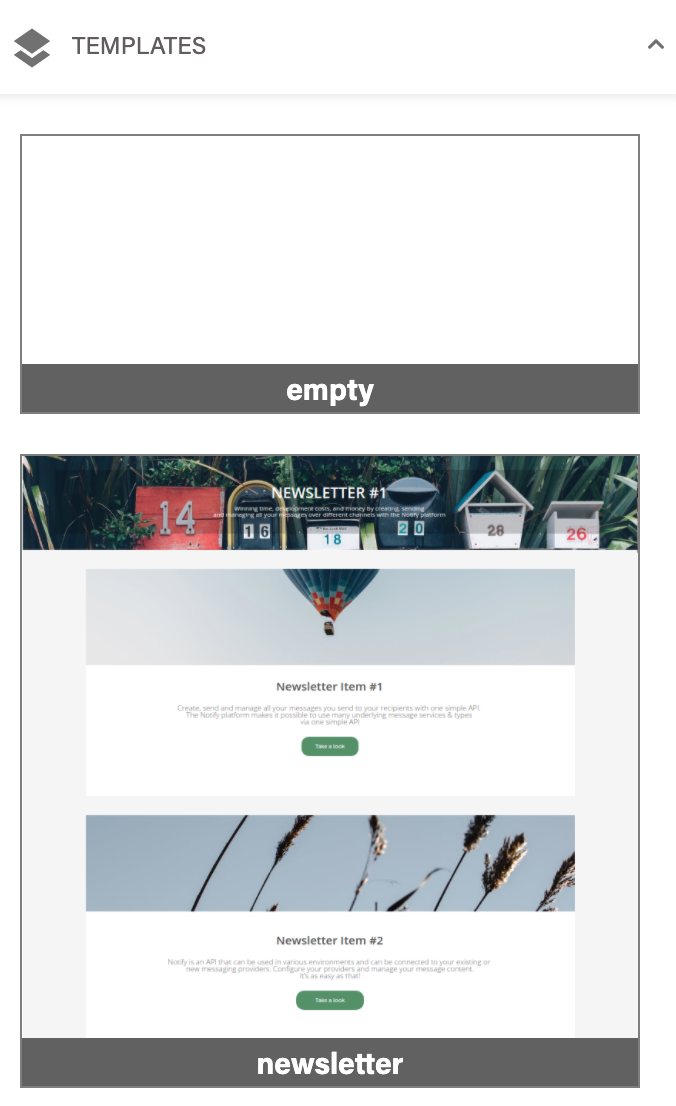
On the left side of your screen, you can find the components needed to build your template. Drag one of the icons onto your template to use it. Each component can be modified further to your liking.
| Icon | Description |
|---|---|
 |
Single column container |
 |
2-column container |
 |
3-column container |
 |
Text component |
 |
Link component |
 |
Button component |
 |
Image component |
When you select a component in your template, you will see a blue box abobe the component, allowing you to :
move the component to a new position
select the parent component
delete the component
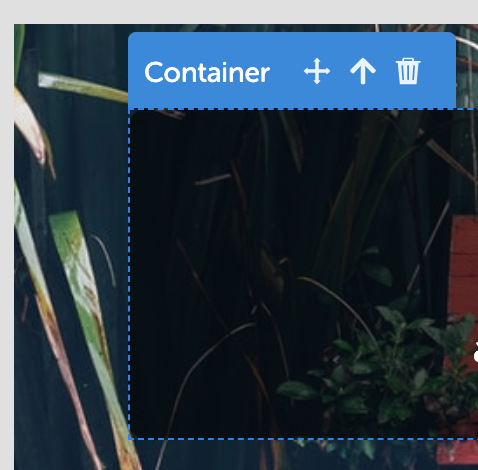
Also, when selecting a component, the sidebar (on the right) will show extra configuration properties that are available.
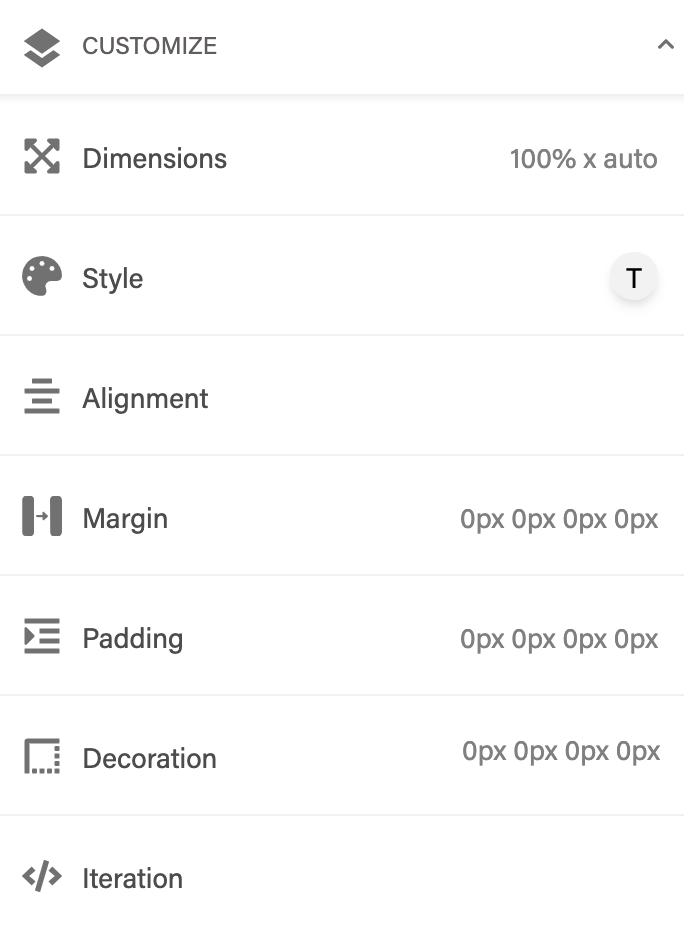
Click on any of the options to open it and modify the settings. Depending on the selected component, one or more of the following configuration options will be available.
Dimensions
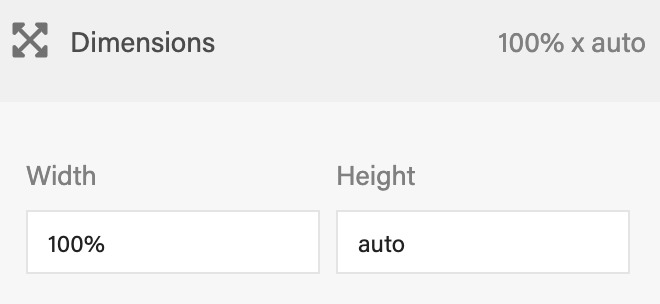
This allows you to define the width and height of your component. Values can be either in % (e.g. 100%) or in pixels (e.g. 300px). ALso the special value 'auto' can be used, this will resize the container automatically depending on its content.
Style
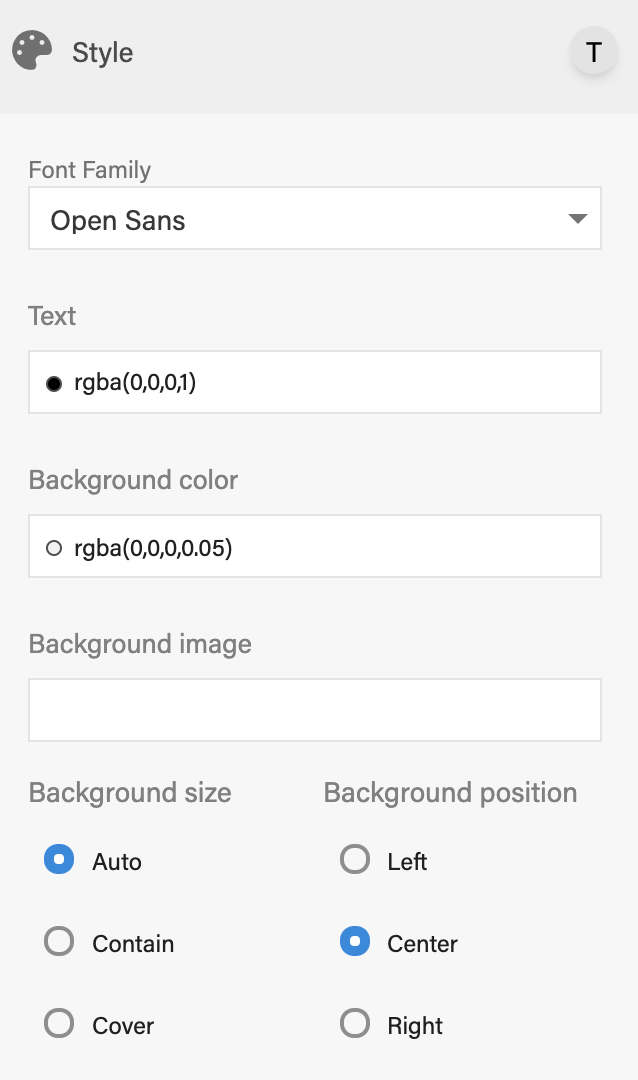
Choose a font style, color, background color to be inherited by all conteined text elements. You can also set a background image for a selected container by providing a URL to the image. Some configuration is also available for positioning the background image.
Alignment
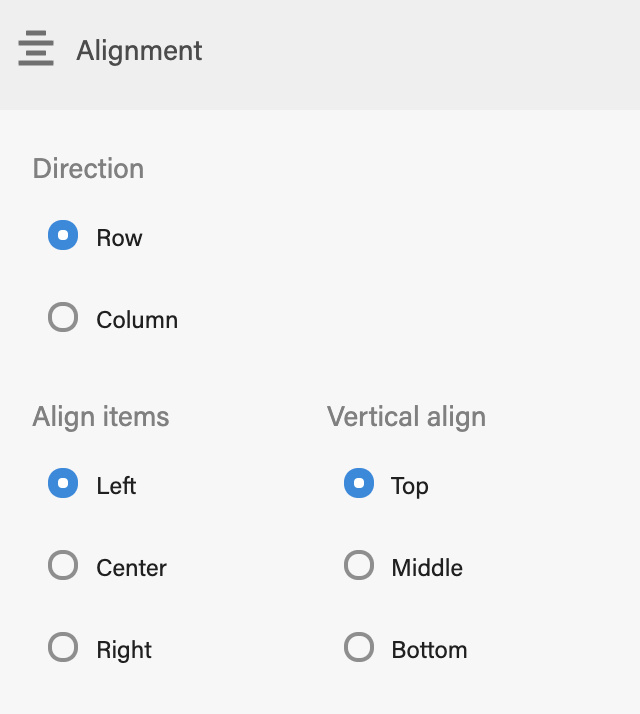
Alignment allows you to define how the contained elements will be positioned :
direction : should components be placed next to each other (column) or below each other (row)
align items : horizontal align contained elements left, center or right
vertical align : vertical align contained elements top, center or bottom
Margin
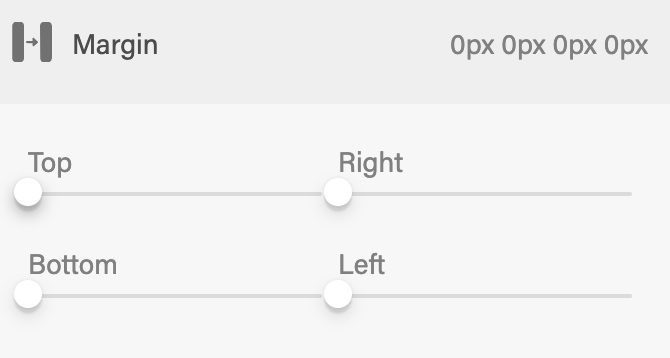
Set the margin of the component to allow some space between the selected component and the parent container (try it, you'll see).
Padding
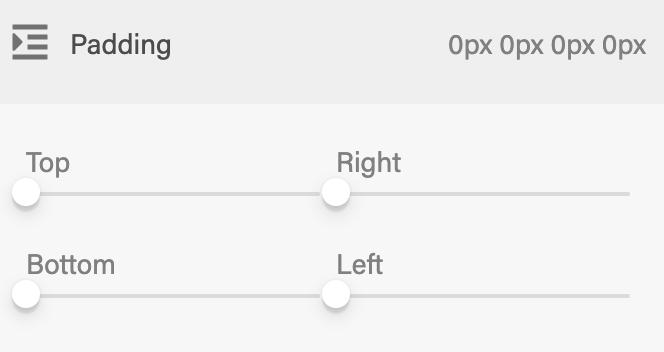
Set the padding of the component to allow some space between the selected component and the elements inside the component.
Decoration
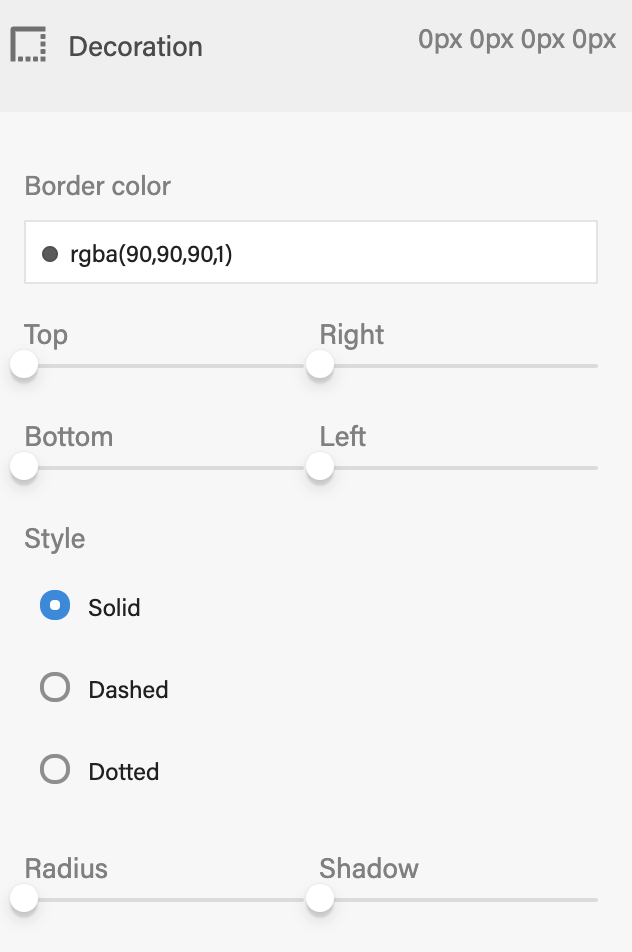
border : set the border with, color and type of the selected component
radius : setting a radius will 'round' the borders of your component with the given amount
shadow : create a drop shadow effect on your component
Typography
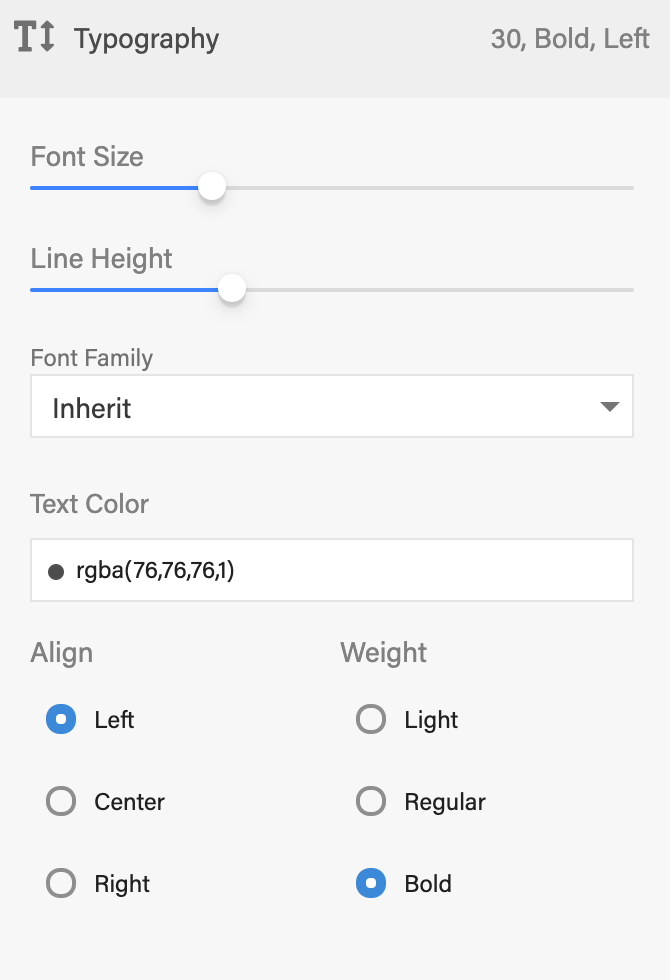
With the typography configuration, you can modify the properties of your font, such as size, font type, line height (space between lines), color and alignment.
Url
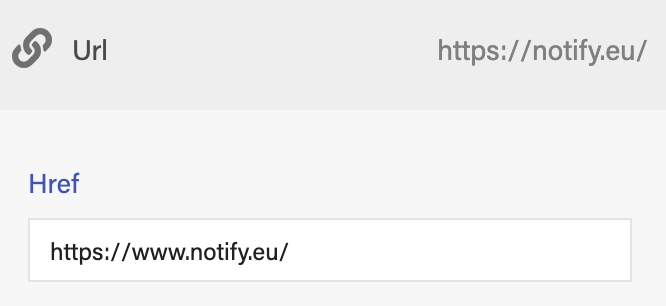
Some components, like button or link, allow you to set an url to go to when the component is clicked.
Iteration
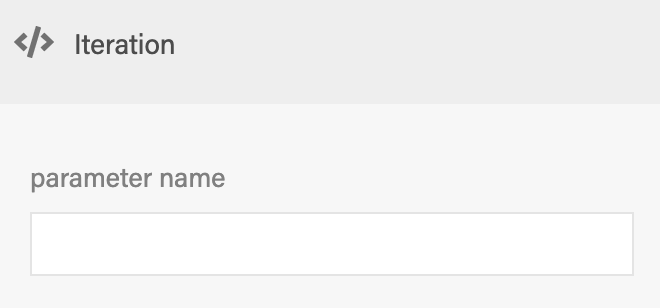
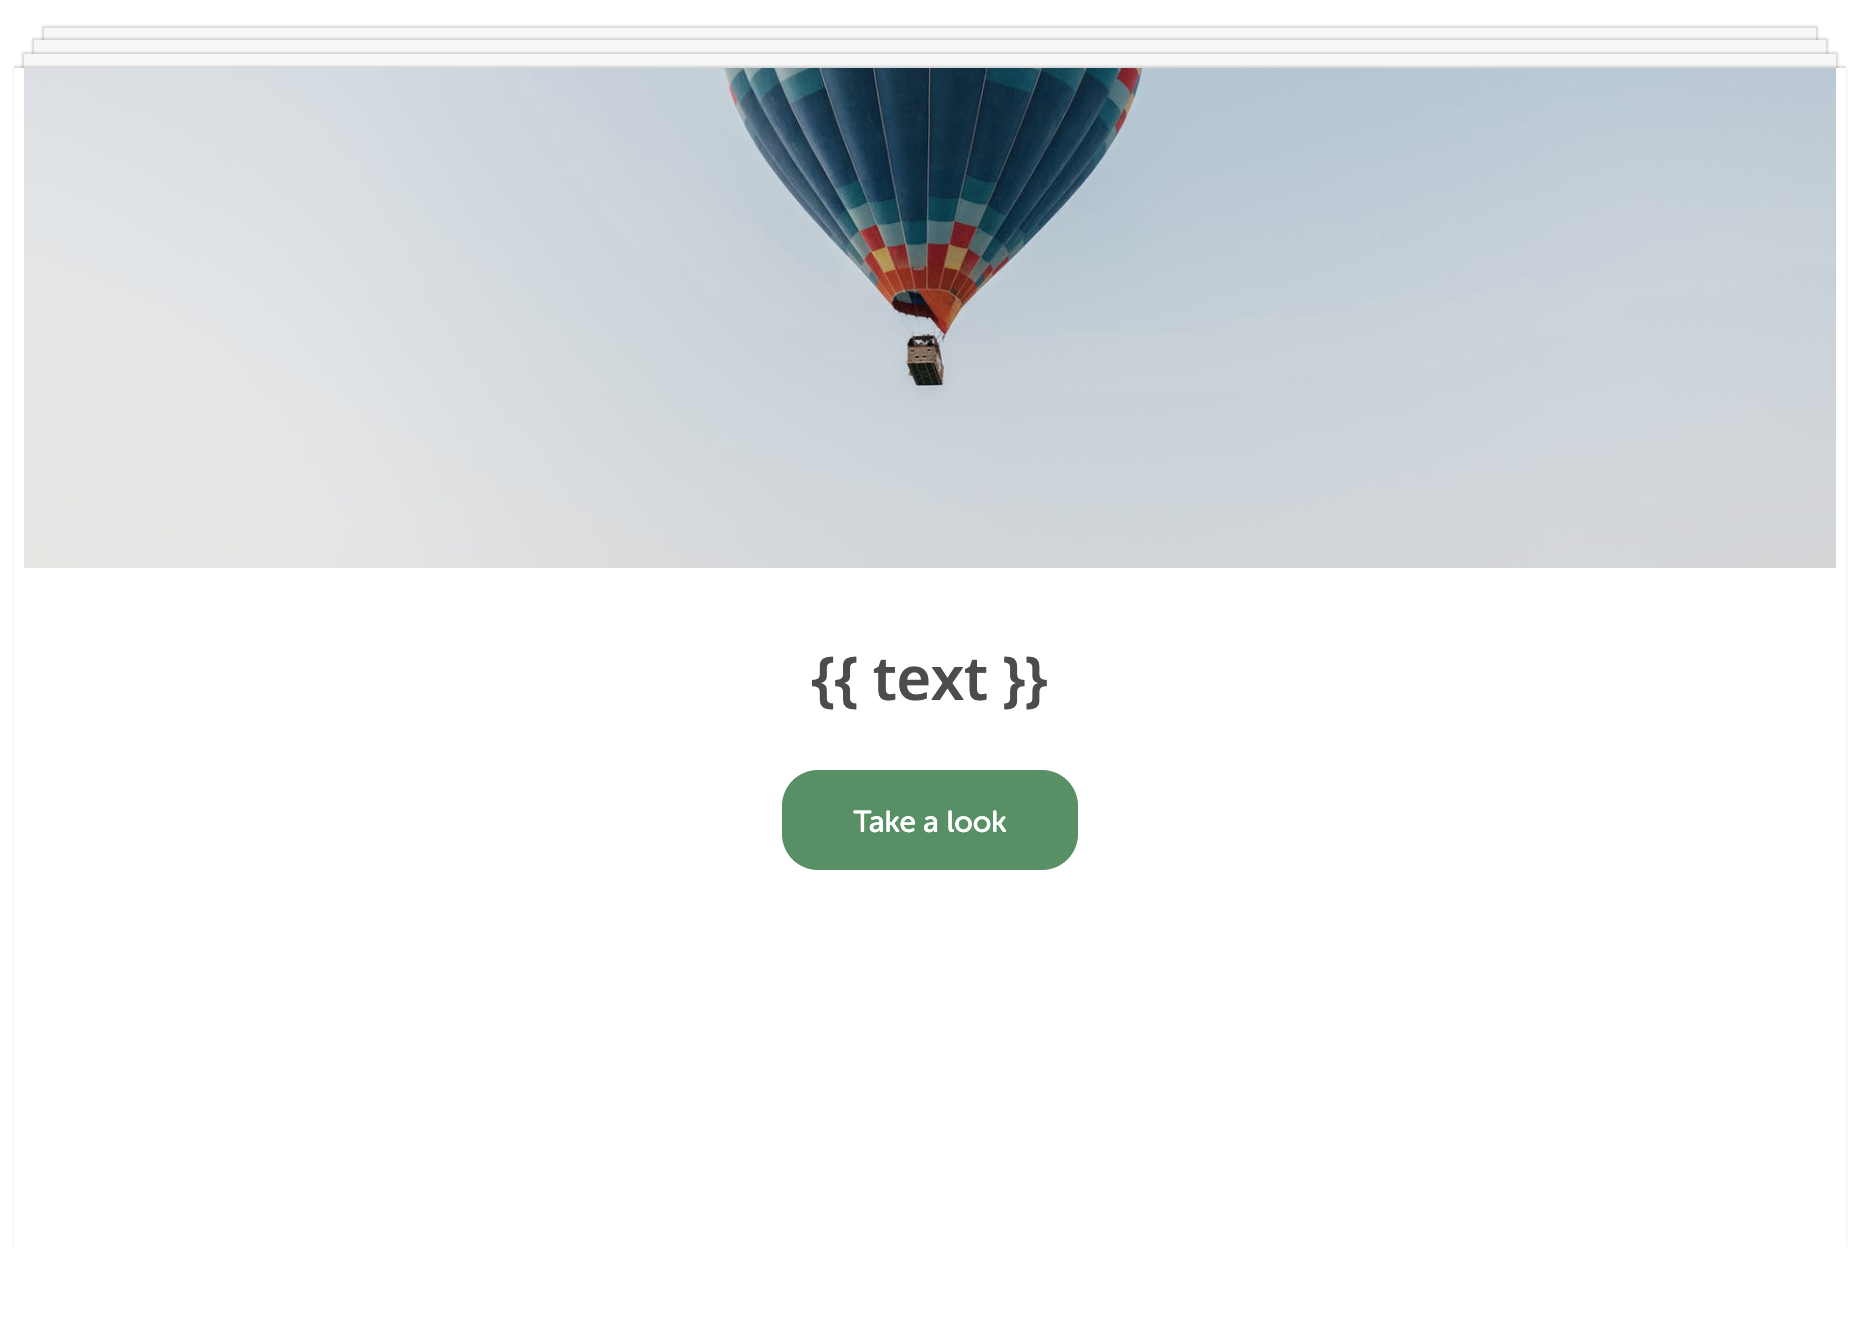
In your templates, you have the option to loop over a parameter array, and show a block for each item in the array. To do this, create a container component, select it, and fill in the parameter over which you want to iterate. To clarify, take a look at following example.
{
  user: {
    notifications: [
      {text: "This is a first notification"},
      {text: "This is a second notification"}
    ]
  }
}
Given the parameters on the right side of your screen, you can loop over the notifications and show the text as shown below :
- After selecting a component, in the iteration field fill in the correct value pointing to an array in your JSON (in this example this would be 'user.notifications')
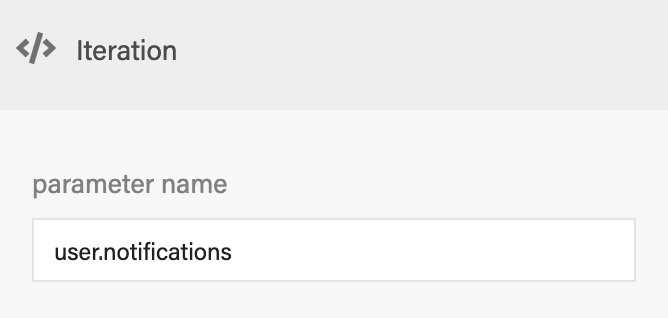
- The selected component will show the iteration on the top as a 'stacked' container. In your iterated component, you can use properties of the iterated object (in this case, '{{text}}' which is a property of the iterated 'user.notifications' value)
HTML mode
Example HTML template
Hello {{ name }}, you have received some information :
<ul>
{{#each notifications}}
<li> {{ text}} </li>
{{/each}}
</ul>

You are subscribed with email address {{ user.email }}
In HTML mode, you can provide your own HTML code to be used as a template for yur notification. Javascript is not allowed in a template.
Our templates use the Handlebars engine to implement parameters ans basic flow in your templates. To use a parameter in your template, you can do this by placing the parameter name between double brackets, e.g. {{ name }} or {{ user.email }}, depending on the format of the parameters used to trigger this notification.
You can loop over array values by using {{#each}}, as shown in the example on the right.
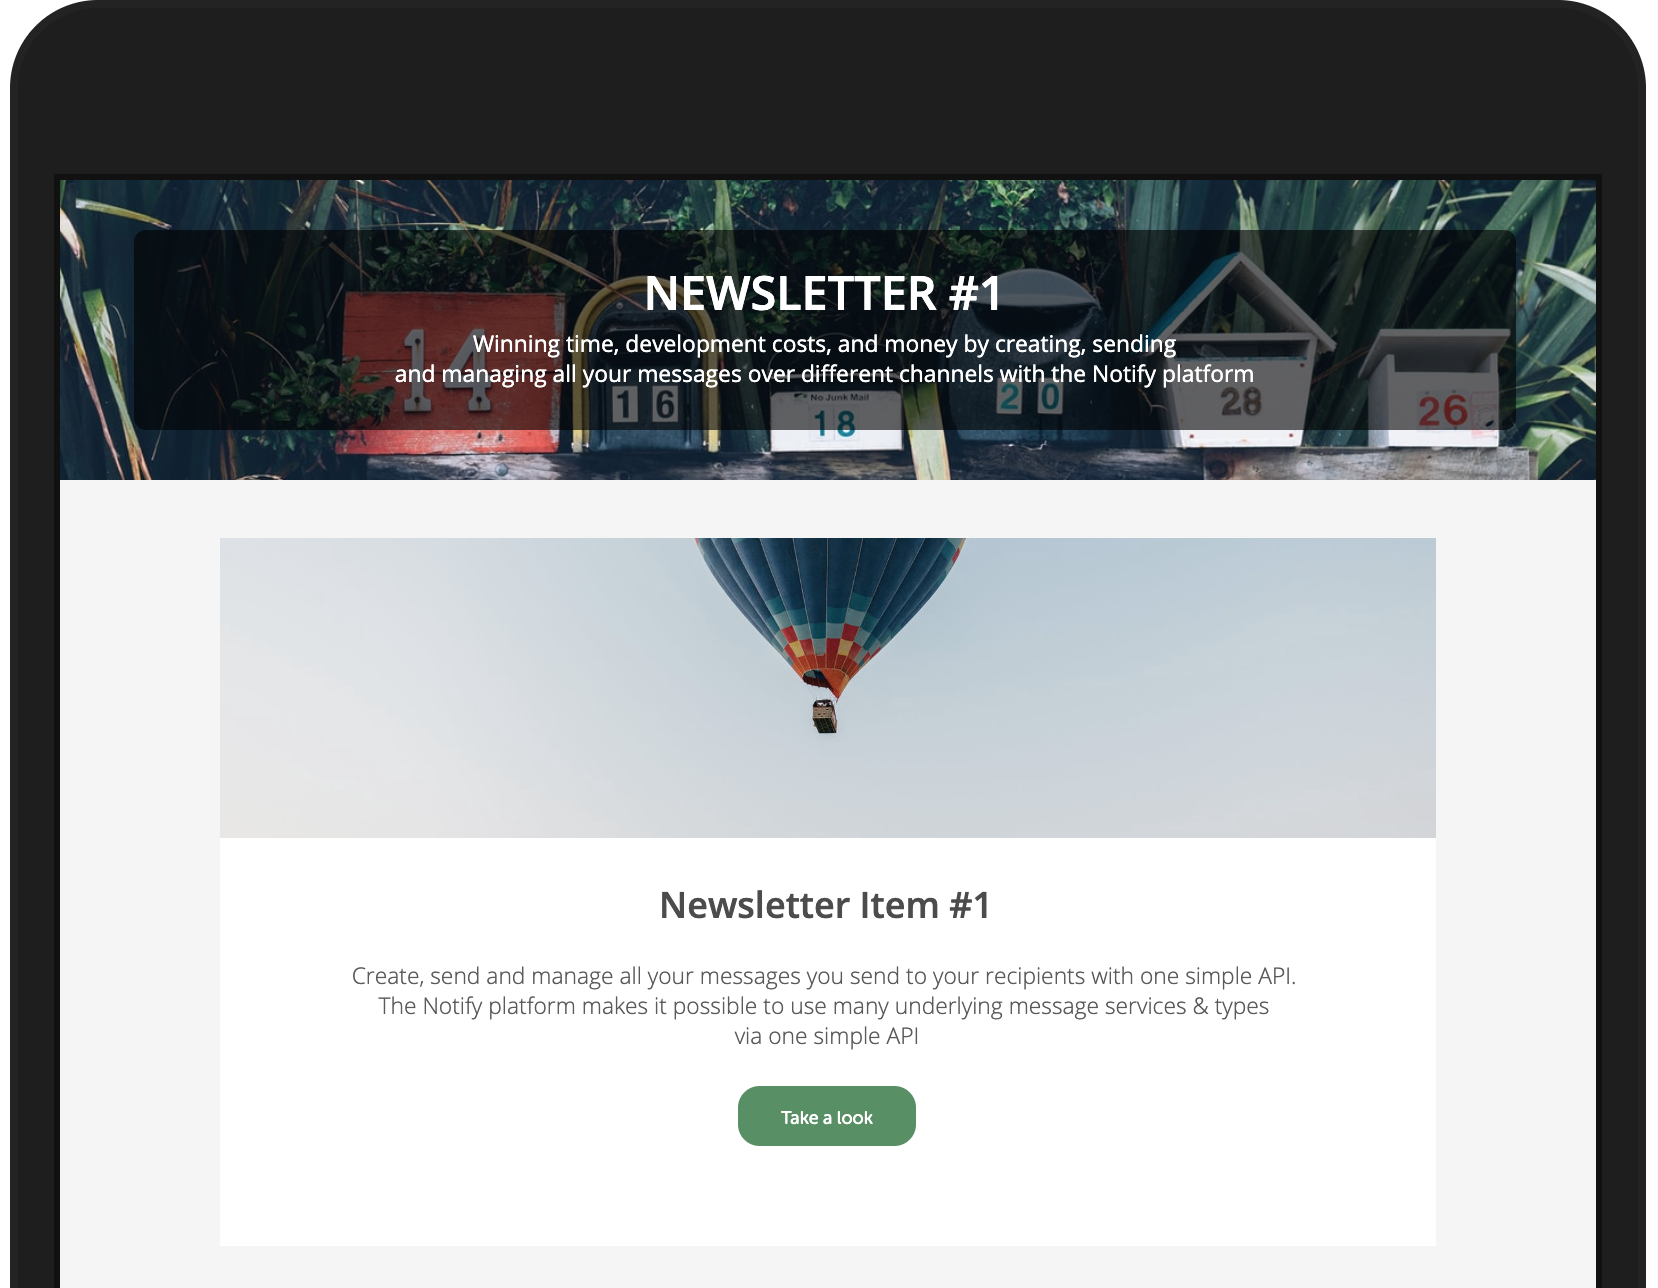
Use the buttons on the top right to preview your changes, save them or cancel and go back without saving.

The preview allows you to see what your template will look like on different devices.
Headers and footers
If you have different notifications with similar layout, we encourage you to use headers and footers for your templates. Go to the headers and footers tab :

Press the 'Create' button and fill in a name for your headers/footers :
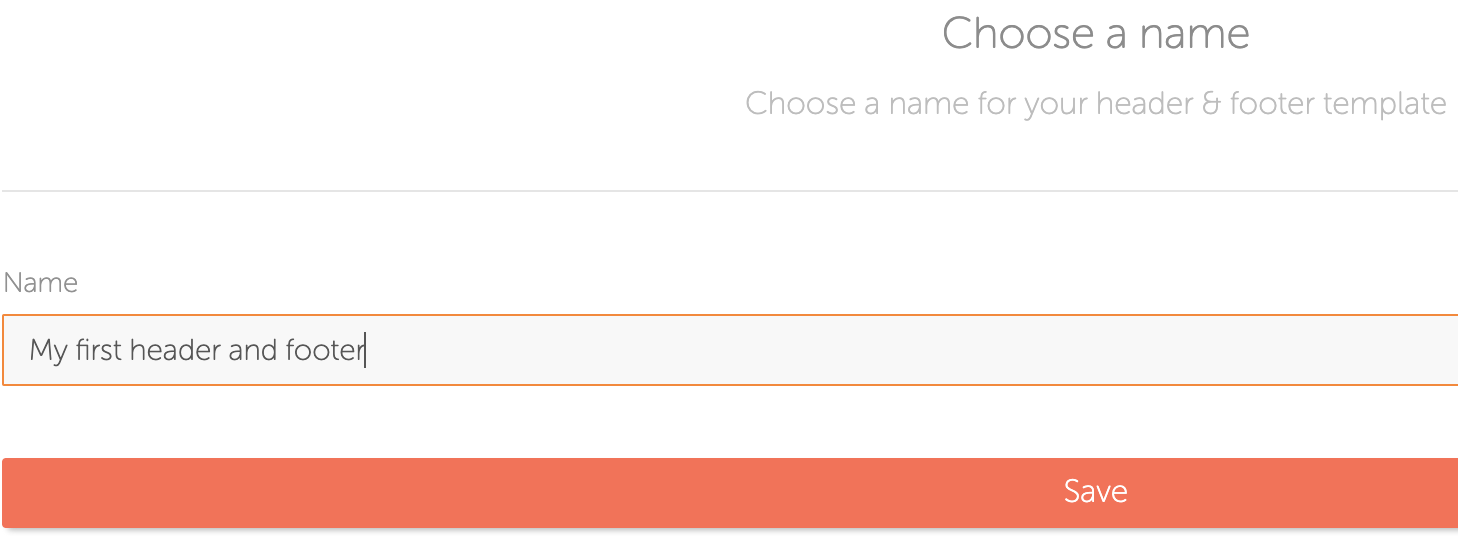
Headers and footers work in a very similar way to regular templates. For each language, you can create a separate content block for the header and the footer. The header will be prepended to your notification and the footer will be appended if selected for the template.
See what's been sent
Notify has a very rich log functionality built into our tool. Our log view allows you to view api calls, notification content, recipients, errors, feedback and replies. The logs can be filtered in many ways, showing only logs for specific channels, or showing a 'conversation' flow of a notification.
To open the logs, select the 'Logs' menu :

On the left side, you will see your channels, divided in an API section, an content section and possible an error section. By default, the logs view will show all types of logs, but selecting one or more channels within a section, will filter only the selected logs for that selection.
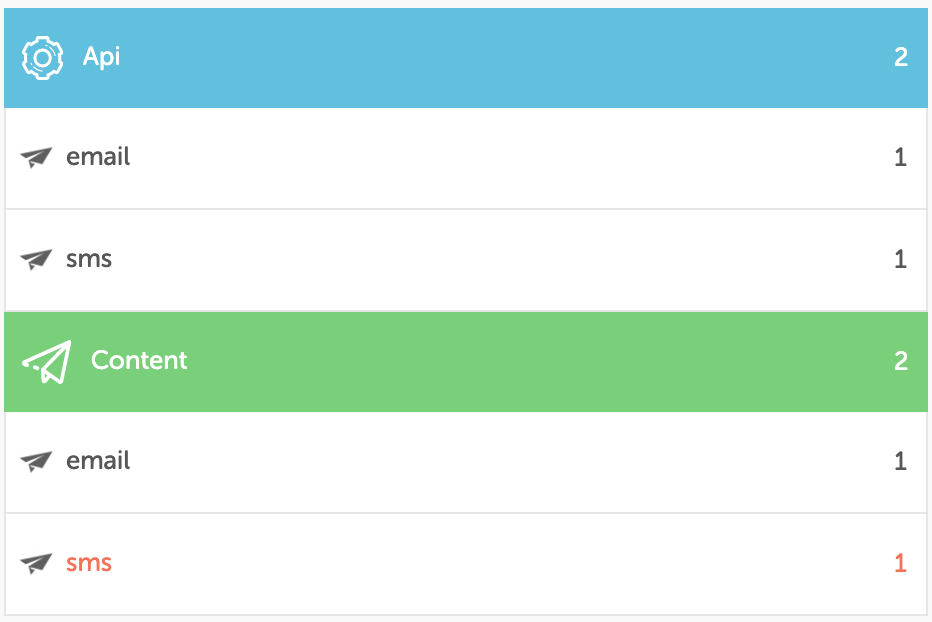
In the log overview, you will find the most important information about the notifications, such as the message, the recipient, the channel used, etc.
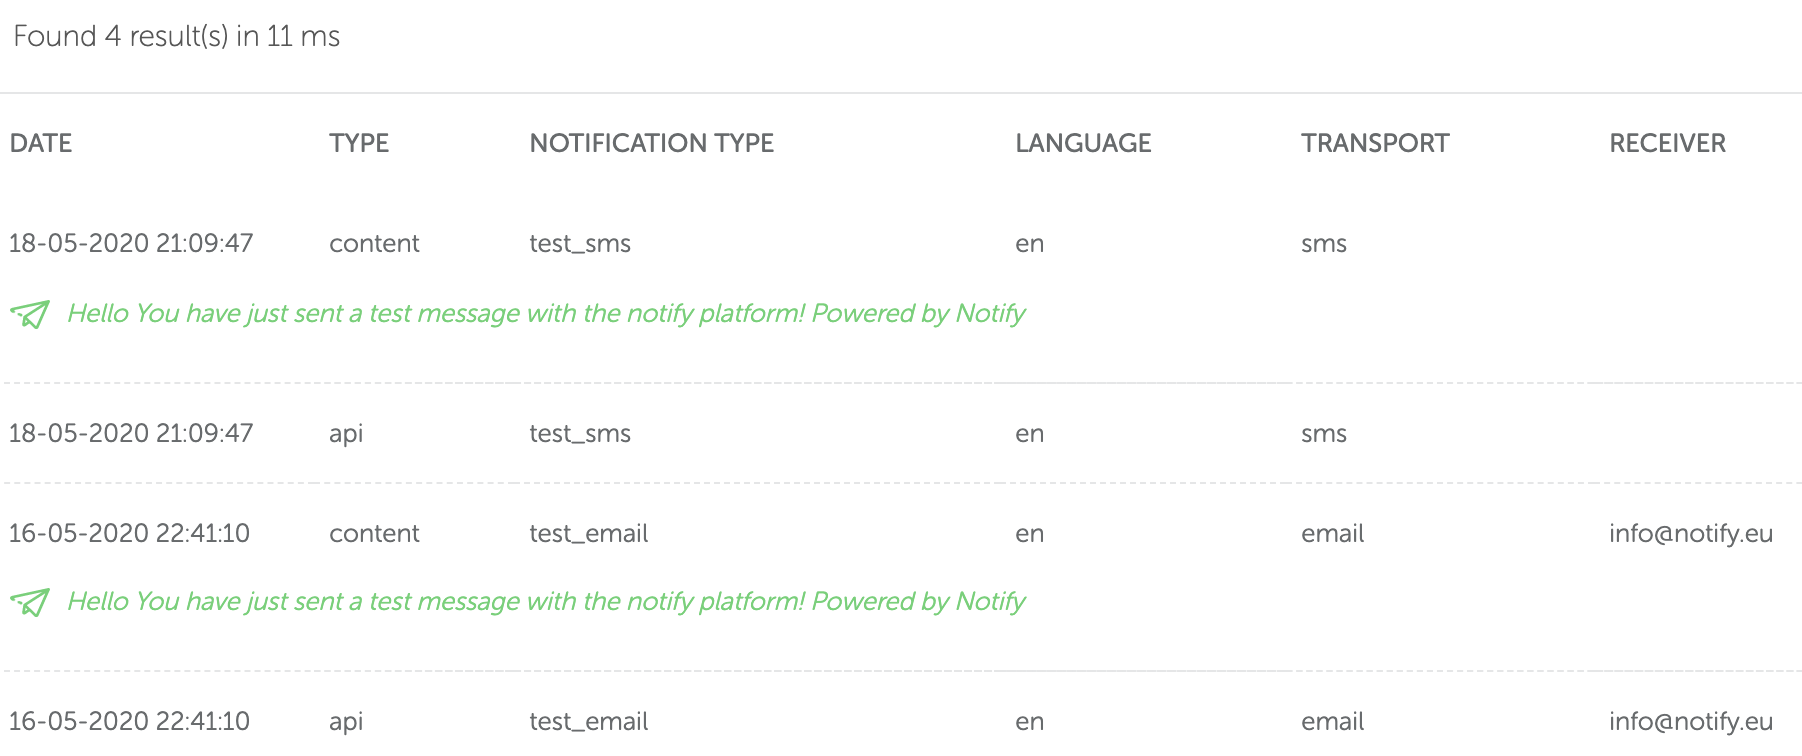
Using the extended filter, you can further narrow down the log list when looking for specific notifications (by recipient, identifier, ...)

Another way to filter the logs, is by opening the graph. Inside this graph, you will get an overview of the notifications sent in the selected month, divided by type (API, content and error). Clicking an area in the graph will set the filter to the selected log type for the selected day timeframe.

When opening a log detail, you will find more information about the API call, the sent notification or the error. For content logs, you will also see the time it took to deliver the message, divided by the time it took for Notify, and the time it took for the backend channel. Using this information, you can analyse any possible delays when sending notifications.
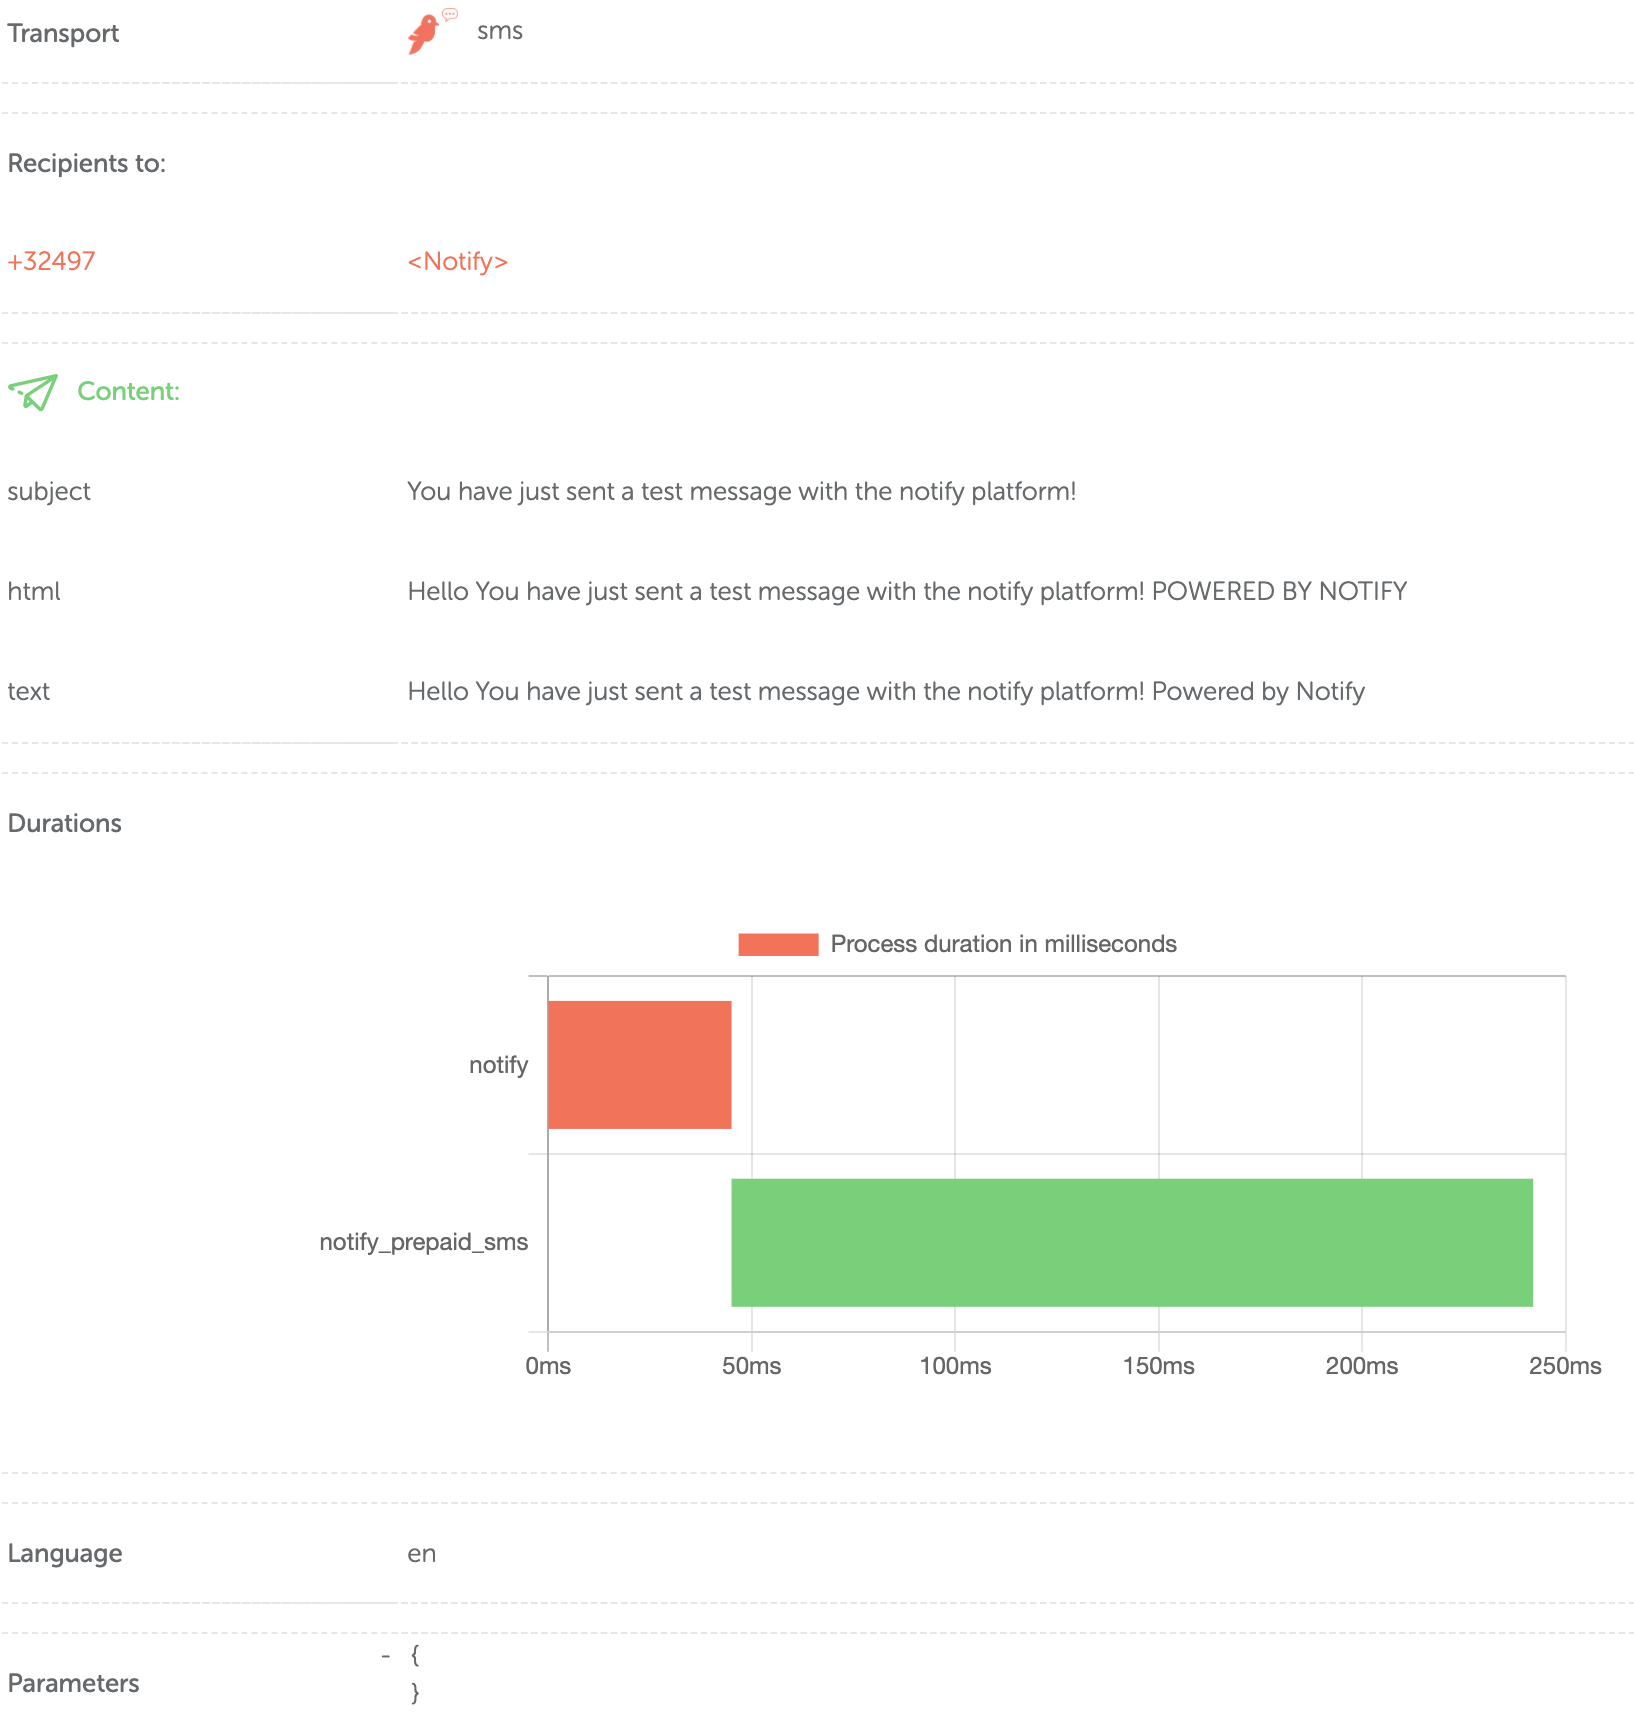
In the log detail screen, you can perform a few actions :

- Resend call (only for log type 'api') : resend the notification
- Copy to clipboard (only for log type 'api') : copy the json from the API call to your clipboard
- Show relevant logs : adjust the logs filter to show all messages with the same identifier as the selected notification
Delay sending messages
With Notify, it is possible to delay your notifications to be sent at a later time. For this, you have two options:
- use scheduledAt in the API call, wich will send the single notification at a later time
- use a digestMail channel, which will group multiple notifications into one single notification and send it at a configured time
Use the scheduledAt API
const request = require('request');

request({
    url: "https://api.notify.eu/notification/send",
    method: "POST",
    json: true,
    body: {
      "message": {
        "notificationType": "marketing_email",
        "language": "en",
        "params": {
        },
        "scheduledAt" : "2020-07-01T14:30:00+02:00",
        "transport": [
          {
            "type": "email_mandrill",
            "recipients": {
              "to": [
                {
                  "name": "John Doe",
                  "recipient": "john@example.com"
                }
              ]
            }
          }
        ]
      }
    }
}, function (error, response, body){
    console.log(response);
});
<?php

$postBody = [
  "message" => [
    "notificationType" => "marketing_email",
    "language" => "en",
    "params" => [],
    "scheduledAt" => "2020-07-01T14:30:00+02:00",
    "transport" => [
      [
        "type" => "email_mandrill",
        "recipients" => [
          "to" => [
            ["name" => "John Doe", "recipient" => "john@example.com"]
          ]
        ]
      ]
    ]
  ]
];

$ch = curl_init("https://api.notify.eu/notification/send");
curl_setopt_array($ch, array(
    CURLOPT_POST => TRUE,
    CURLOPT_RETURNTRANSFER => TRUE,
    CURLOPT_HTTPHEADER => array('Content-Type: application/json', 'X-ClientId: <your_client_id>', 'X-SecretKey: <your_secret_key>'),
    CURLOPT_POSTFIELDS => json_encode($postBody)
));

$response = curl_exec($ch);

if ($response === FALSE){
    die(curl_error($ch));
}

$responseData = json_decode($response, TRUE);
curl -i -H "Content-type: application/json" -H "X-ClientId: <your_client_id>" -H "X-SecretKey: <your_secret_key>" -X POST https://api.notify.eu/notification/send -d '
  {
    "message": {
      "notificationType": "marketing_email",
      "language": "en",
      "params": {
      },
      "scheduledAt": "2020-07-01T14:30:00+02:00",
      "transport": [
        {
          "type": "email_mandrill",
          "recipients": {
            "to": [
              {
                "name": "John Doe",
                "recipient": "john@example.com"
              }
            ]
          }
        }
      ]
    }
  }
  '
When sending a notification using the Notify API, you can add a json property scheduledAt to specify when the notification should be sent.
The scheduling uses the default datetime format, like '2020-07-05T08:15:30-05:00'. If the timezone offset (-05:00 in this example) is omitted, the default UTC timezone will be used.
A list of UTC offsets can be found on this Wikipedia page
Use a digestMail channel
Digest notifications are different from scheduled notifications in two aspects :
- The send time is configured in the digest channel (cron expression)
- A digest notification can consist of multiple single notifications, automatically grouped by recipient
A digest channel can be created just like any other channel. Follow the on-screen documentation to set up and use the digest functionality.
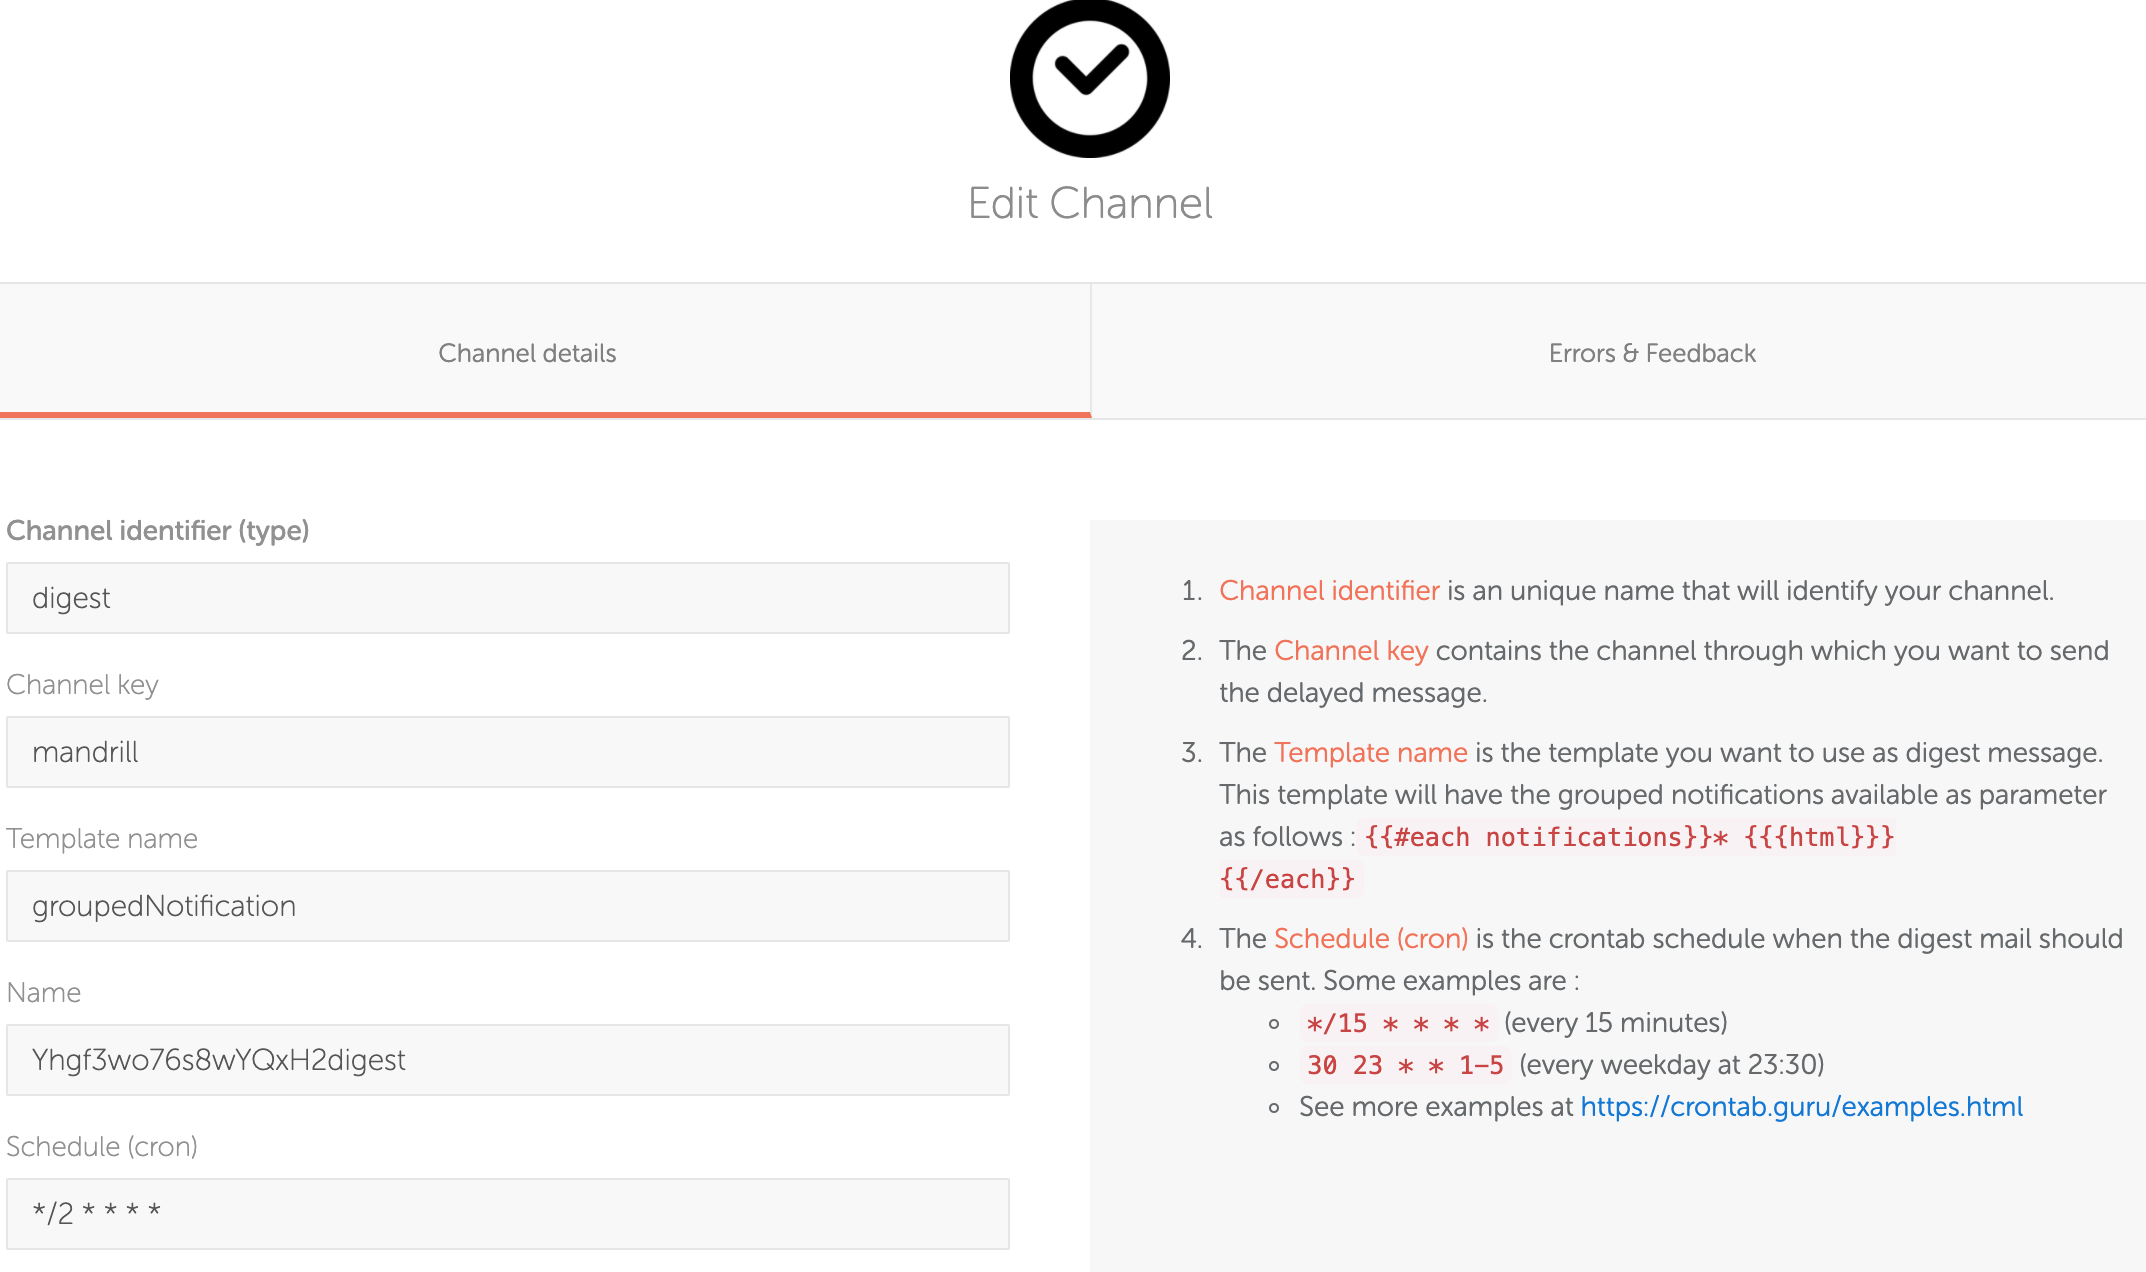
You can use the digest channel in your API call just like any other channel. So, what will happen when you do this ? This digest channel will save your notification, but not send it straight away. If any more notifications are sent through this digest channel to the same recipient, it will be saved as well, linked to this recipient.
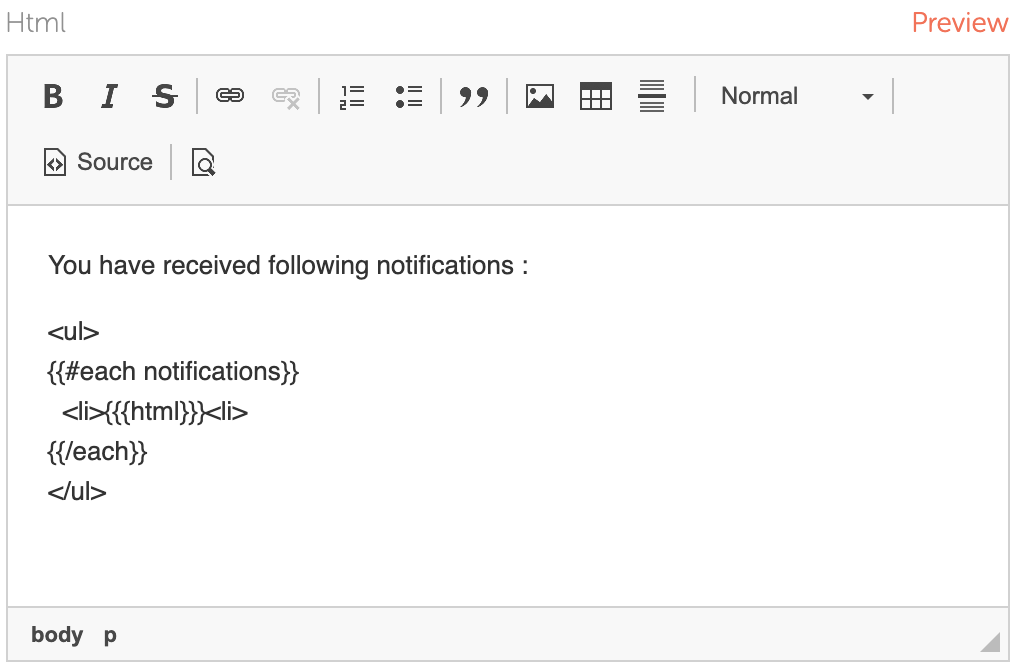
At the configured time (cron in the digest channel), the configured template from your digest channel will be sent out to the recipient through the configured channel (usually mail, but you can use digest with any channel type), and all the grouped notifications will be available in this template as parameters. This way, you can create a digest mail, design it as you wish, and include the separate notifications in this template.
You have received following notifications :

<ul>
{{#each notifications}}
  <li>{{{html}}}</li>
{{/each}}
</ul>
Receive incoming replies
Notify allows you to receive replies from many of your channels in a uniform way. These replies will be logged in the Notify tool, and you can forward them to other Notify channels, such as email or a webhook.
Not all channels support reply at this time, but we're working hard to allow this for most channels.
| Channel | Reply Support |
|---|---|
| RingRing SMS | Yes |
| Twilio SMS | Yes |
| CMTelecom SMS | Yes |
| Mandrill email | Coming soon |
| SMTP email | Coming soon |
To set up receiving replies, you should follow the onscreen documentation for each individual channel. Go to the Settings menu

and select the Channel details submenu.

Select your channel, and in the popup, open the reply tab.
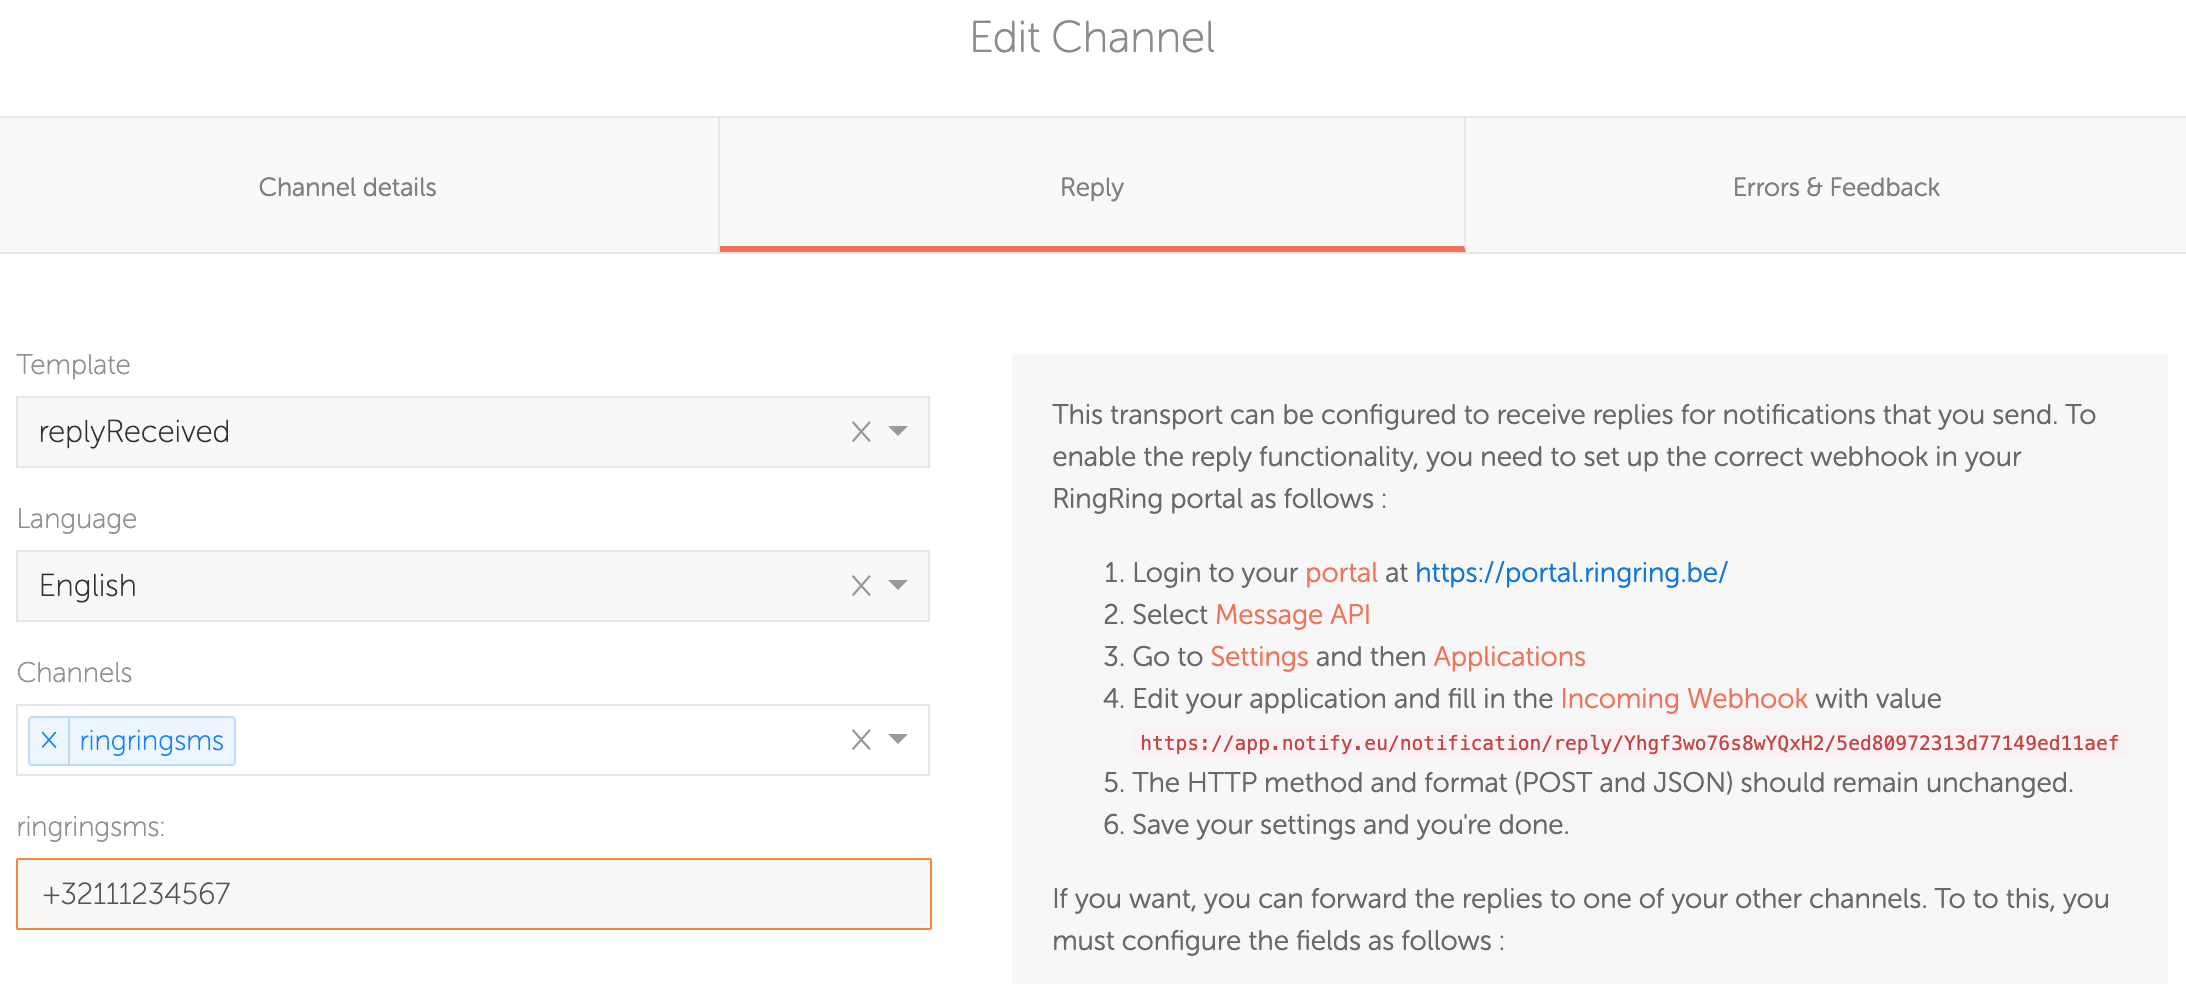
All info on configuring and forwarding the replies is available onscreen. When set up properly, the replies will be visible in the logs overview (with the same identifier as the original notification). If you forward the replies to other channels, such as a webhook, this will also be visible in the logs.

"params" : {
  sender: "32111234567"
  message: "Dank je voor het bericht"
  replyData: {
    MessageId: "a046932b-d7da-4aa7-8a08-3e6ea8dfe4e4"
    Reference: null
    From: "+32111234567"
    To: "8810"
    Message: "Dank je voor het bericht"
    Country: "BE"
    TimeReceived: "2020-05-11 10:13:36"
  }
}
Forwarding the reply to a webhook, allows you to send the reply to your own application from all your channels, with one single webhook format. The forwarding of the reply will include a 'params' property containing the sender (email, phone number), the message, and all the extra parameters that we receive from the backend (Twilio, RingRing, ...). See an example of the 'params' property in the code section on the right of your screen.
Handle errors and feedback
By default, Notify will log errors while sending notifications, such as missing templates, invalid recipients, or servers that are not reachable (smpt, webhook, ...). On top of this logging, you can set up feedback logging for specific channels. Feedback provides more information about the sent notification, such as delivered SMS messages, or bounced mails. This feedback is provided and depends on the sending backend such as Twilio, Mandrill, ...
Just like replies, errors and feedback can be forwarded to other Notify channels such as email, webhook, Slack and more. This way, you will be notified immediatly when your notifications do not reach their destination for some reason.
To set up receiving replies, you should follow the onscreen documentation for each individual channel. Go to the Settings menu

and select the Channel details submenu.

Select your channel, and in the popup, open the reply tab.
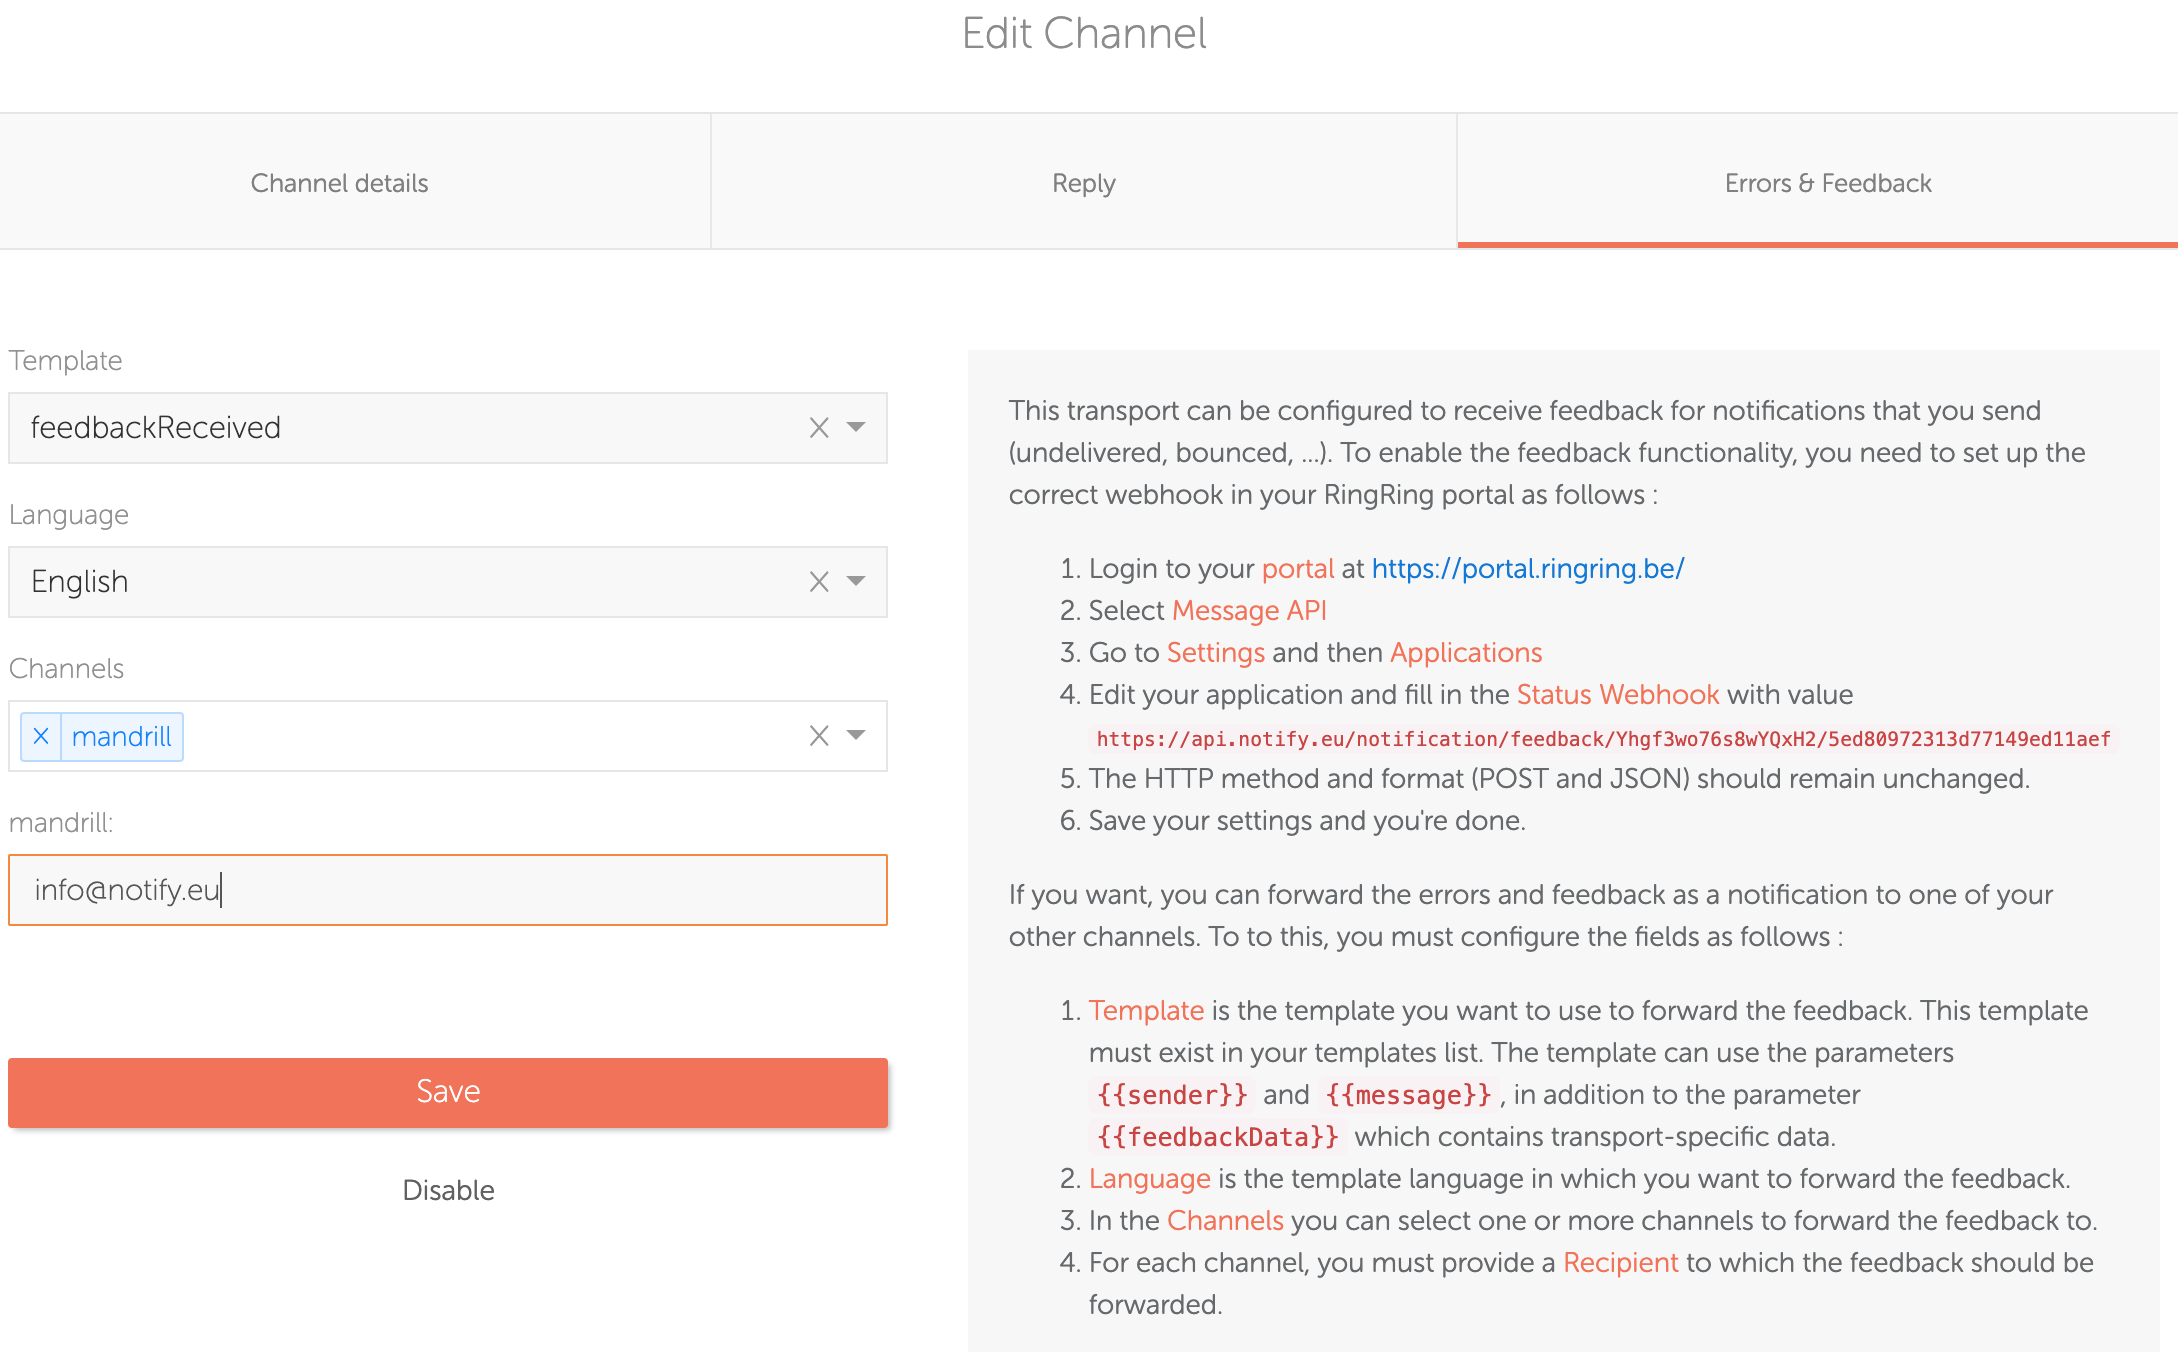
All info on configuring and forwarding the feedback and errors is available onscreen. When set up properly, the feedback and errors will be visible in the logs overview (with the same identifier as the original notification). If you forward the feedback or errors to other channels, such as a webhook, this will also be visible in the logs.
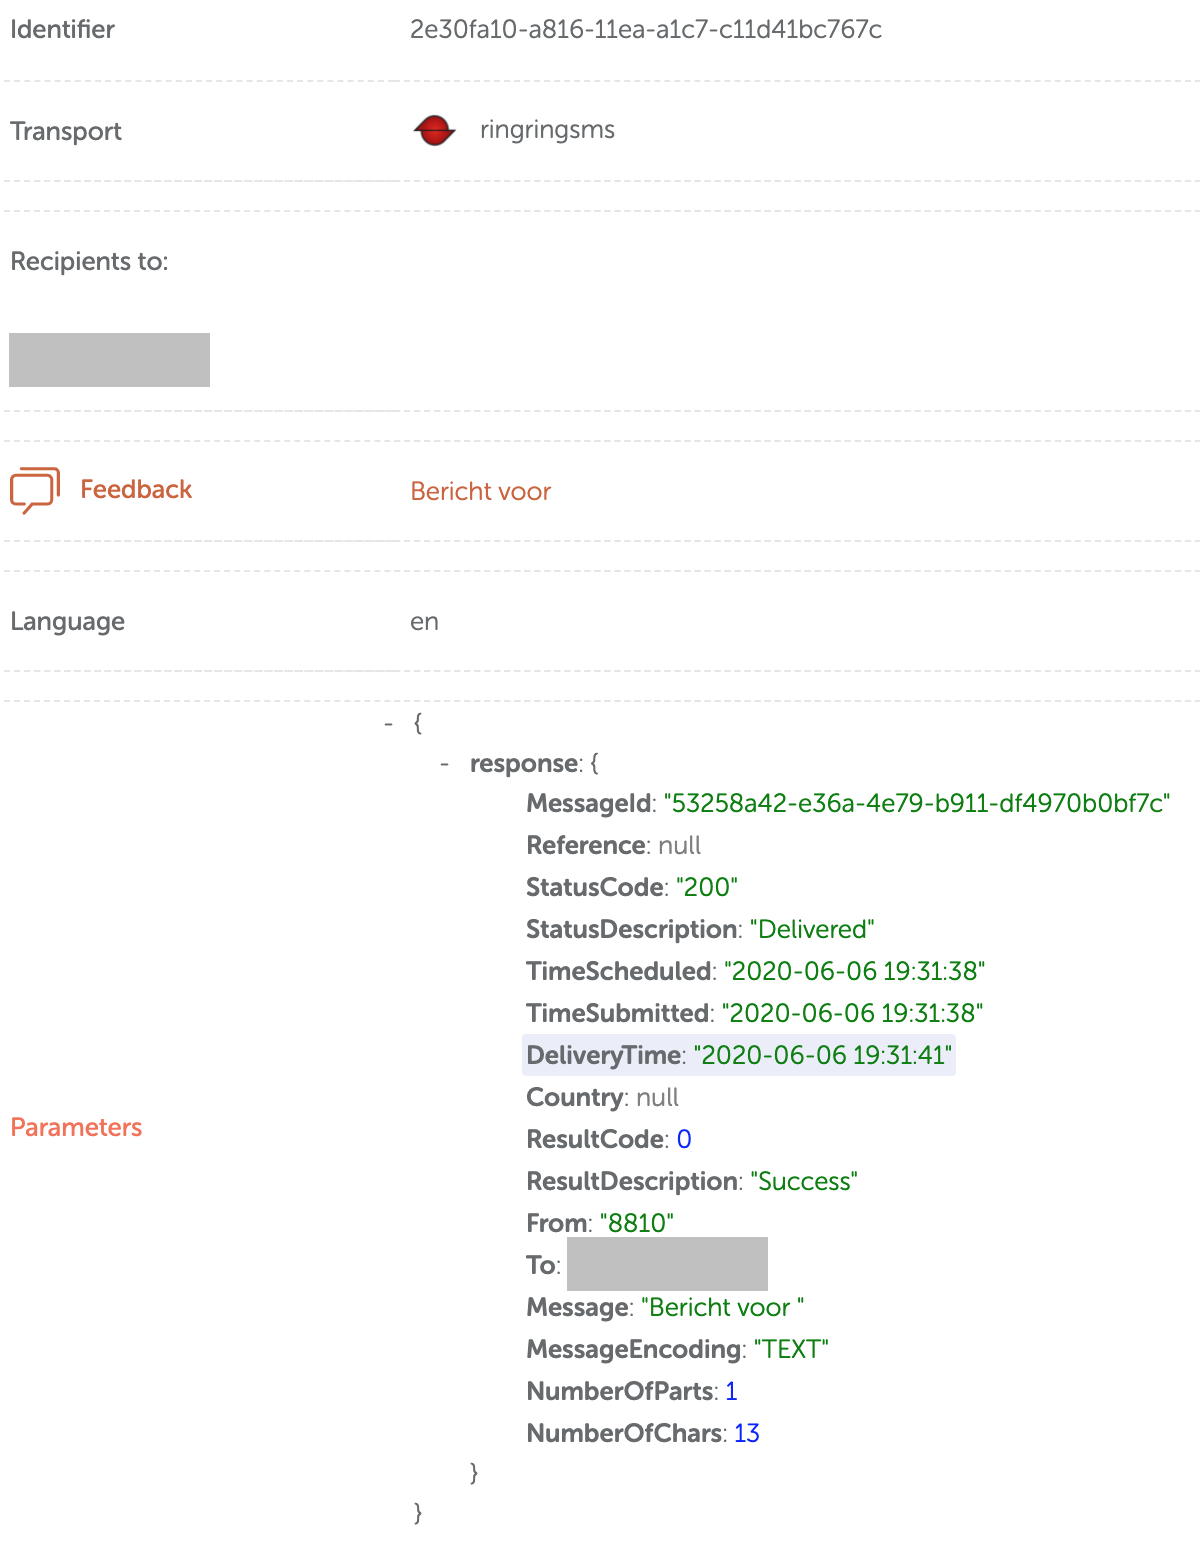
"params": {
        "sender": "+32111234567",
        "message": "<p>Bericht voor Notify</p>\n",
        "feedbackData": {
            "MessageId": "04e61925-8222-44cb-a11b-cb3918c16054",
            "Reference": null,
            "StatusCode": "200",
            "StatusDescription": "Delivered",
            "TimeScheduled": "2020-06-06 18:53:00",
            "TimeSubmitted": "2020-06-06 18:53:01",
            "DeliveryTime": "2020-06-06 18:53:04",
            "Country": null,
            "ResultCode": 0,
            "ResultDescription": "Success",
            "From": "8810",
            "To": "32111234567",
            "Message": "<p>Bericht voor Notify</p>\n",
            "MessageEncoding": "TEXT",
            "NumberOfParts": 1,
            "NumberOfChars": 33
        }
    }
Forwarding the errors and feedback to a webhook, allows you to send the reply to your own application from all your channels, with one single webhook format. The forwarding of the reply will include a 'params' property containing the sender (email, phone number), the message, and all the extra parameters that we receive from the backend (Twilio, RingRing, ...). See an example of the 'params' property in the code section on the right of your screen.
Resend failed messages
When messages cannot be sent to the recipient for some reason, you can automatically retry sending the message after a configured amount of time. The reason of failed messages can be unavailable backends, but just as well a missing template.
Seting up auto-resend requires just one easy step. Go to the Settings menu

and select the Channel details submenu.

Select your channel, and in the popup, open the retry tab.
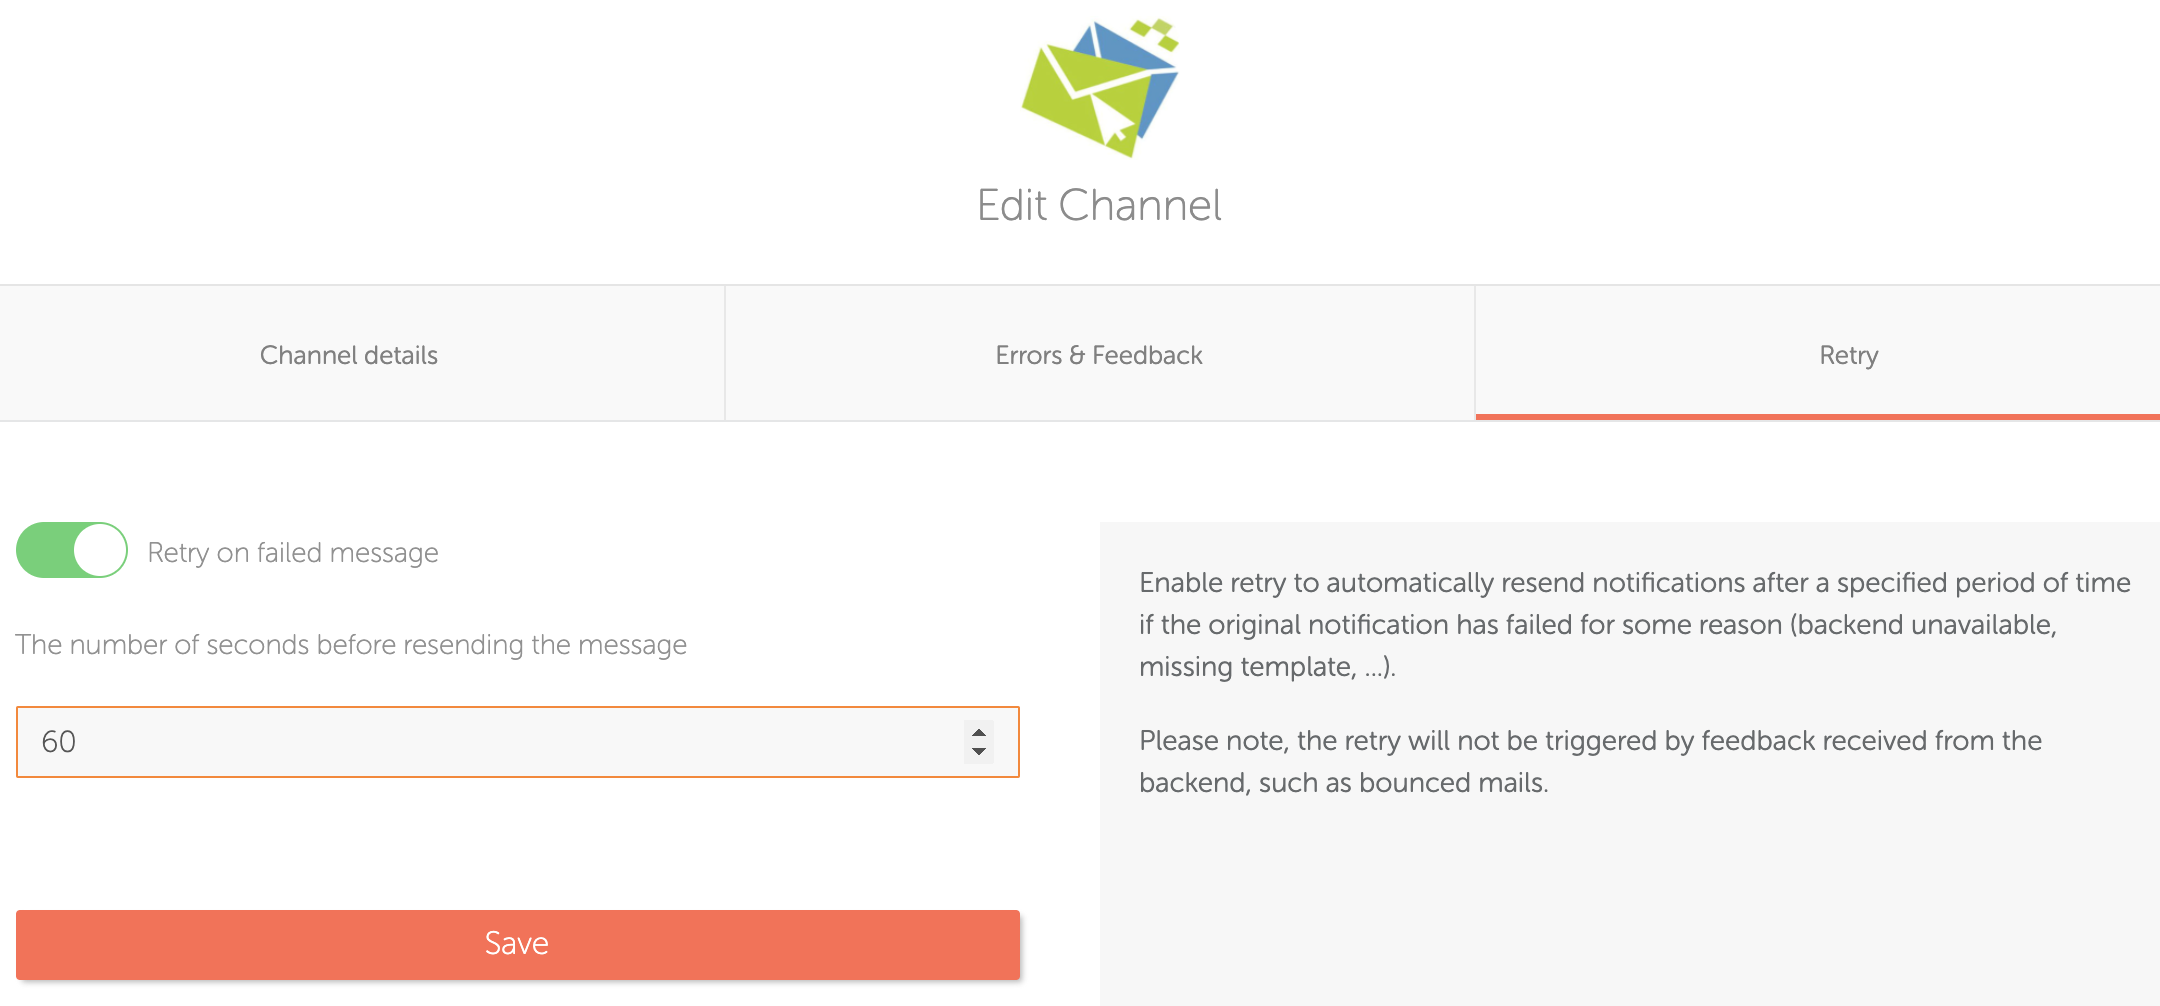
In this tab, you can toggle the 'retry' option and set an amount of seconds to wait before resending the message. If the resend fails as well, there will be no further attempt to resend the message. Of course, you can manually resend the message from the log detail screen, and you will be notified of the error in our logs and optionally through the feedback forwarding.
API credentials
To use the Notify API, you need at least one set of credentials. You can have multiple sets of credentials, e.g. one for each of your applications using Notify.
To manage your credentials, go to the 'Settings' menu :

Choose the tab 'Credentials' :

This tab will give you an overview of your existing credentials. Please note that is is not possible to view the secret key after it has been generated. If you have lost your key, select the credential :
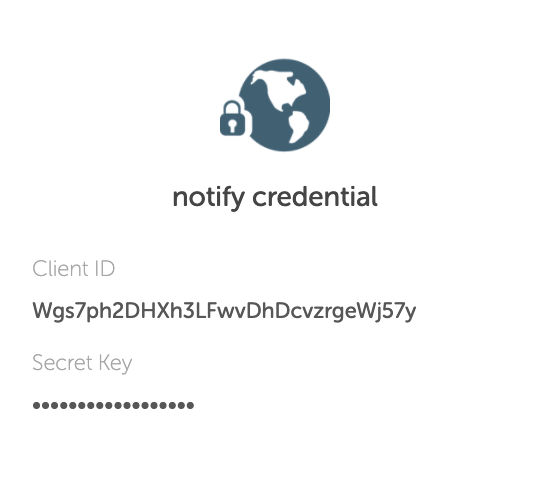
And then regenerate the secret key :

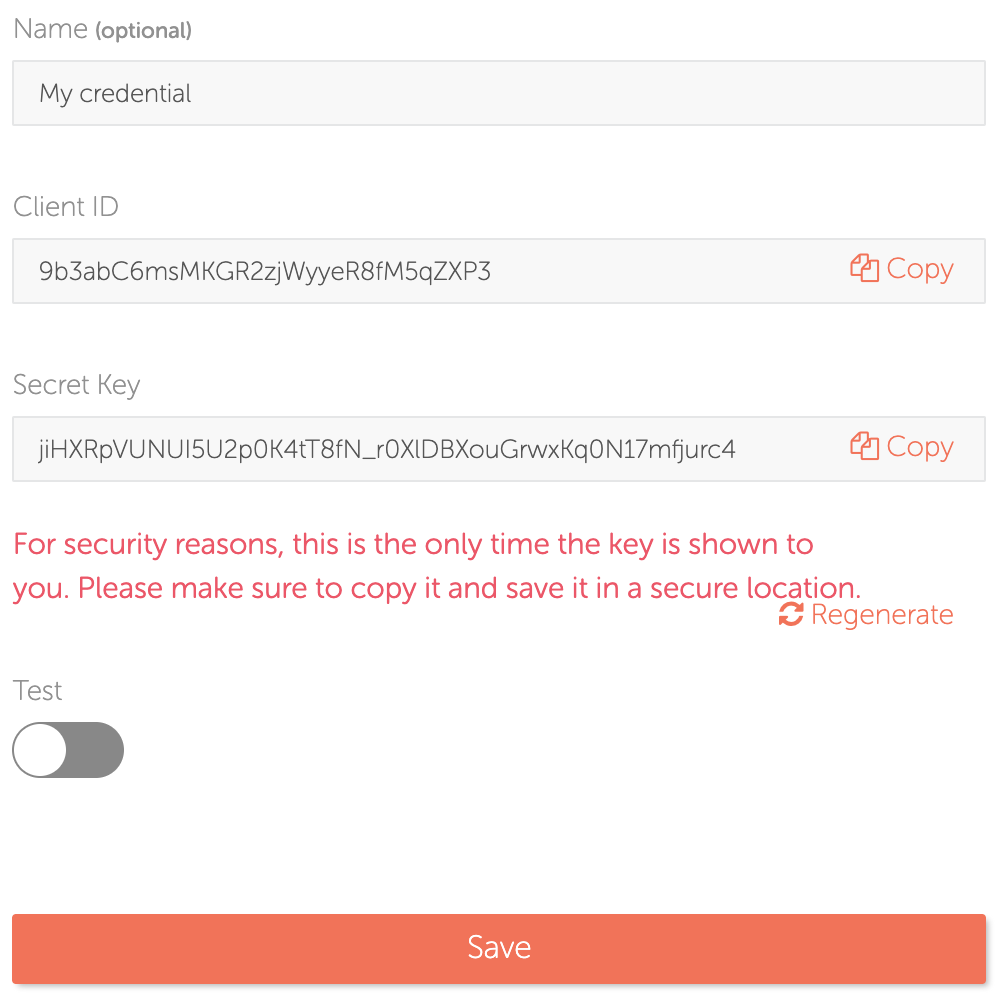
As noted before, you can have multiple sets of credentials. For your convenience, each credential can have an optional name to make it easier to identify them. Toggle the 'Test' button if these credentials are for testing purposes. This way, the notifications will be logged into our system but they will not be actually sent to the recipients.
API
Credentials
The Notify API requires you to use a client id and secret key for authentication. These credentials can be managed in your Notify account. The authentication must be sent using http headers :
| Header key | Type | Required | Notes |
|---|---|---|---|
| X-ClientId | String | Yes | Your credential client id |
| X-SecretKey | String | Yes | Your credential secret key |
Send notification
Notify provides one single API that can send messages over all your configured channels. The structure is always exactly the same, with exception of some small variations in the recipient section.
Endpoint
https://api.notify.eu/notification/send
Method
POST
Fields
const request = require('request');

request({
    url: "https://api.notify.eu/notification/send",
    method: "POST",
    json: true,
    body: {
      "message": {
        "notificationType": "marketing_email",
        "language": "en",
        "params": {
          "firstname": "James",
          "age": "25"
        },
        "scheduledAt" : "2020-07-01T14:30:00+02:00",
        "transport": [
          {
            "type": "email_mandrill",
            "from": {"name": "Jim Doe", "email": "jim@example.com"},
            "recipients": {
              "to": [
                {
                  "name": "John Doe",
                  "recipient": "john@example.com"
                }
              ],
              "cc": [
                {
                  "name": "Jane Doe",
                  "recipient": "jane@example.com"
                }
              ],
              "bcc": [
                {
                  "name": "Joe Doe",
                  "recipient": "joe@example.com"
                }
              ],
              "Reply-To": "reply@example.com"
            }
          }
        ],
        "attachments": [
          {
            "filename": "test.txt",
            "content": "Base64 encoded string",
            "contentType": "text/plain"
          }
        ]
      }
    }
}, function (error, response, body){
    console.log(response);
});
<?php

$postBody = [
  "message" => [
    "notificationType" => "marketing_email",
    "language" => "en",
    "params" => ["firstname" => "James", "age" => "25"],
    "scheduledAt" => "2020-07-01T14:30:00+02:00",
    "transport" => [
      [
        "type" => "email_mandrill",
        "from" => ["name" => "Jim Doe", "email" => "jim@example.com"],
        "recipients" => [
          "to" => [
            ["name" => "John Doe", "recipient" => "john@example.com"]
          ],
          "cc" => [
            ["name" => "Jane Doe", "recipient" => "jane@example.com"]
          ],
          "bcc" => [
              ["name" => "Joe Doe", "recipient" => "joe@example.com"]
          ],
          "Reply-To" => "reply@example.com"
        ]
      ]
    ],
    "attachments" => [
      [
        "filename" => "test.txt",
        "content" => "Base64 encoded string",
        "contentType" => "text/plain"
      ]
    ]
  ]
];

$ch = curl_init("https://api.notify.eu/notification/send");
curl_setopt_array($ch, array(
    CURLOPT_POST => TRUE,
    CURLOPT_RETURNTRANSFER => TRUE,
    CURLOPT_HTTPHEADER => array('Content-Type: application/json', 'X-ClientId: <your_client_id>', 'X-SecretKey: <your_secret_key>'),
    CURLOPT_POSTFIELDS => json_encode($postBody)
));

$response = curl_exec($ch);

if ($response === FALSE){
    die(curl_error($ch));
}

$responseData = json_decode($response, TRUE);
curl -i -H "Content-type: application/json" -H "X-ClientId: <your_client_id>" -H "X-SecretKey: <your_secret_key>" -X POST https://api.notify.eu/notification/send -d '
  {
    "message": {
      "notificationType": "marketing_email",
      "language": "en",
      "params": {
        "firstname": "James",
        "age": "25"
      },
      "scheduledAt": "2020-07-01T14:30:00+02:00",
      "transport": [
        {
          "type": "email_mandrill",
          "from": {"name": "Jim Doe", "email": "jim@example.com"},
          "recipients": {
            "to": [
              {
                "name": "John Doe",
                "recipient": "john@example.com"
              }
            ],
            "cc": [
              {
                "name": "Jane Doe",
                "recipient": "jane@example.com"
              }
            ],
            "bcc": [
              {
                "name": "Joe Doe",
                "recipient": "joe@example.com"
              }
            ],
            "Reply-To": "reply@example.com"
          }
        }
      ],
      "attachments": [
        {
          "filename": "test.txt",
          "content": "Base64 encoded string",
          "contentType": "text/plain"
        }
      ]
    }
  }
  '
| Field Name | Type | Required | Notes |
|---|---|---|---|
| message | Object | Yes | Root object for your notification. |
| message.identifier | String | No | You can provide a custom identifier for your message. If not provided, Notify will generate a unique identifier. |
| message.notificationType | String | Yes | NotificationType is the type of the template you like to use, as configured in your notify account. |
| message.language | String | Yes | The template language to use, in ISO 639 format. |
| message.params | Object | No | You can fill this with a custom json object which will be passed on to your template. |
| message.scheduledAt | DateTime | No | Use this if you want to send the notification at a later time. The format uses the standard datetime format, like '2020-07-05T08:15:30-05:00'. If the timezone offset (-05:00 in this example) is omitted, the default UTC timezone will be used. |
| message.transport | Array | Yes | |
| message.transport.type | String | Yes | Specify which configured channel you would like to use to send the notification. |
| message.transport.criteria | String | No | Optional criteria for using an alternative message template. To use this, create a template in the Notify app with criteria and use the same criteria in your API call. |
| message.transport.from | Object | No | This field is the "from" address when sending emails, e.g. {"name": "Jim Doe", "email": "jim@example.com"} or the from phone number in case of sms. |
| message.transport.recipients | Object | Yes | Recipients contains data about who will receive the notification. |
| message.transport.recipients.to | Array | Yes | Person(s) you're sending the notification to, e.g. Email : [{"name": "Joe Doe", "recipient": "joe@example.com"}] SMS : [{"name": "Joe Doe", "recipient": "+32490123456"}] Push : This is the topic(s) the user is subscribed to, e.g. [{"recipient": "news"}, {"recipient", "politics"}] Slack : Channel(s) you're sending message to. Value can be channel name or ID, e.g. [{"recipient": "general"}, {"recipient", "ZMLDJ3JAK"}] Webhook : The recipient is included in the webhook data and allows you to link the incoming data to the correct user in your application. |
| message.transport.recipients.cc (only for email channels) |
Array | No | e.g. [{"name": "Joe Cc", "recipient": "cc@example.com"}] |
| message.transport.recipients.bcc (only for email channels) |
Array | No | e.g. [{"name": "Joe Bcc", "recipient": "bcc@example.com"}] |
| message.transport.recipients.Reply-To (only for email channels) |
String | No | This is the email address the receiver will reply to |
| message.attachments (only for email channels) |
Array | No | Contains an array of attachments which will be send together with your email. (The size will depend on the transport.) |
| message.attachments[0] (only for email channels) |
Object | No | Contains the attachment data |
| message.attachments[0].filename (only for email channels) |
String | No | The original name and extension of the file. This is needed for decoding the file. |
| message.attachments[0].content (only for email channels) |
String | No | The file encoded as a base64 string. |
| message.attachments[0].contentType (only for email channels) |
String | Yes | The mime type of the attachment eg. image/png, text/plain. |
Response
Success
A successful API call will return the unique identifier for your notification. A successful API call does not mean that the message has already been sent. Make sure you check the logs, or setup a feedback mechanism for dealing with failed messages, as all the messages are sent asynchroneously by Notify.
{ "success": true, "identifier": "015da530-e867-11e8-9580-3b2b4d2b2a6b" }
Error
If your API call fails for any reason, you will get an error message like following :
{ "success": false, "message": "customer not found" }